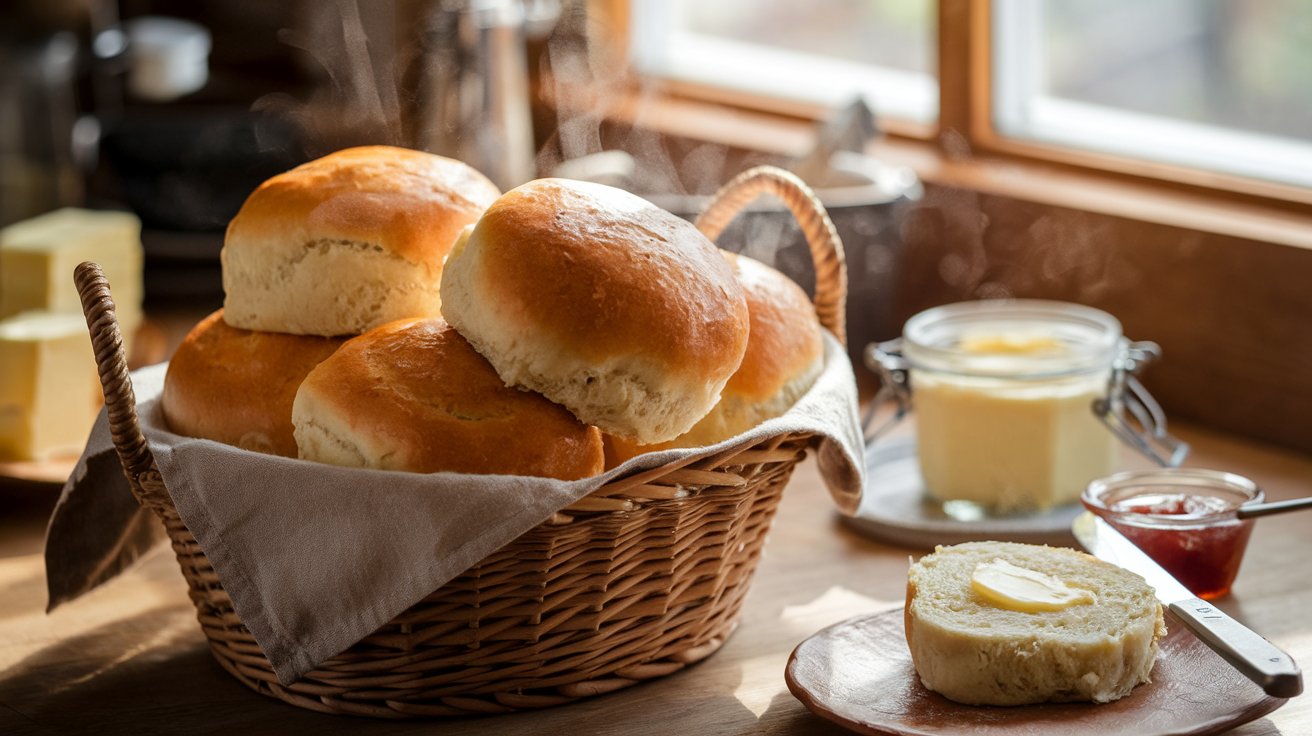
Imagine serving warm, fluffy dinner buns that require no hours-long proofing or fancy ingredients. This no-yeast recipe is perfect for those who crave freshly baked bread but don’t have yeast on hand—or the time to wait for dough to rise. These buns come together quickly, making them ideal for a last-minute addition to your dinner table.
Tools and Equipment Needed
Basic Kitchen Tools You’ll Need
Preparing no-yeast dinner buns requires minimal equipment, making it an accessible recipe for any home cook. Here’s what you’ll need:
- Mixing bowls: One large bowl for combining the dough and another for any additional mixing needs.
- Measuring cups and spoons: To ensure precise ingredient measurements for the best results.
- Wooden spoon or spatula: For mixing the ingredients into a cohesive dough.
- Baking sheet or tray: To bake the buns; line it with parchment paper for easy cleanup.
- Pastry brush (optional): Useful for brushing milk or butter on top of the buns for a golden finish.
- Oven mitts: Essential for safely handling hot trays from the oven.
Optional Tools for Perfect Results
While the basics will suffice, these additional tools can make the process even smoother and help you achieve professional-quality results:
- Dough cutter or bench scraper: Handy for dividing the dough into even portions.
- Rolling pin: Useful if you prefer uniform thickness for shaping the buns, though not strictly necessary.
- Kitchen scale: For precise dough measurement to ensure evenly sized buns.
- Cooling rack: Allows the buns to cool evenly without becoming soggy on the bottom.
- Pastry mat or silicone mat: Provides a non-stick surface for kneading or shaping the dough.
Having these tools on hand can streamline the preparation process and enhance the quality of your no-yeast dinner buns, making them look and taste bakery-worthy.
Step-by-Step Guide to Making No-Yeast Dinner Buns
Mixing the Dry Ingredients
- Start with the Basics: In a large mixing bowl, combine your dry ingredients—flour, baking powder, and salt. Use a whisk to evenly distribute the baking powder and salt throughout the flour.
- Choosing the Right Flour: For best results, stick to all-purpose flour. If you prefer a healthier option, whole wheat flour can be used, but it may slightly alter the texture. A mix of all-purpose and whole wheat flour is a great compromise.
- Balancing Baking Powder and Salt: Ensure you measure these accurately. Too much baking powder can give the buns a metallic aftertaste, while too little can result in dense buns. A teaspoon of baking powder per cup of flour is a good rule of thumb.
Adding the Wet Ingredients
- Incorporating Milk or Dairy Alternatives: Gradually add milk (or a dairy alternative) to the dry mixture. Stir as you pour to create a soft dough. Oat milk or almond milk works well for dairy-free options.
- Using Oil or Butter for Moisture: Melted butter or oil adds moisture and richness. Mix it in thoroughly to ensure the fat is evenly distributed throughout the dough.
Kneading and Shaping the Dough
- Tips for Gentle Kneading: Turn the dough onto a floured surface and gently knead it a few times. Avoid over-kneading, as this can make the buns dense. Aim for a smooth, cohesive dough that’s not too sticky.
- How to Shape Uniform Buns: Divide the dough into equal portions. You can use a kitchen scale for precision or simply eyeball it. Roll each portion into a ball with lightly floured hands, ensuring the surface is smooth.
Baking the Buns
- Setting the Perfect Oven Temperature: Preheat your oven to 375°F (190°C). This temperature ensures the buns bake evenly, creating a golden crust while keeping the inside soft.
- Knowing When They’re Done: Bake the buns for 15-20 minutes, or until the tops are golden brown. To check for doneness, tap the bottom of a bun—it should sound hollow. Alternatively, a toothpick inserted into the center should come out clean.
By following these steps, you’ll have warm, fluffy no-yeast dinner buns ready to serve in no time! Perfect as a side dish, sandwich base, or snack on their own.
Tips and Tricks for Perfect No-Yeast Buns
Ensuring Proper Dough Consistency
- Achieve the Right Texture: The dough should be soft but not sticky. If it’s too dry, add a tablespoon of milk at a time until the desired consistency is reached. If it’s too sticky, sprinkle in a little flour, but be careful not to overdo it, as excess flour can make the buns tough.
- Don’t Overmix: Once the wet and dry ingredients are combined, mix until just incorporated. Overmixing can overdevelop the gluten, resulting in dense buns.
Adjusting Baking Time for Your Oven
- Ovens Vary: Every oven bakes differently. Use the suggested time as a guideline but keep an eye on your buns. If your oven runs hot, check a few minutes earlier; if it runs cool, you may need to bake slightly longer.
- Rotate the Tray: For even baking, rotate the baking sheet halfway through the cooking time, especially if your oven has hot spots.
- Test for Doneness: A golden-brown color on the top is a good visual cue, but tapping the bottom for a hollow sound or using a toothpick test will confirm they’re fully baked.
Common Mistakes to Avoid
- Skipping Preheating: Always preheat your oven. Baking buns in an oven that’s not fully heated can result in uneven cooking and less rise.
- Overkneading: Gentle handling of the dough is crucial. Overkneading can compress the dough and make the buns chewy instead of soft.
- Measuring Ingredients Incorrectly: Use measuring cups and spoons for accuracy. Scooping flour directly from the bag can pack it down, leading to too much flour and dry dough. Instead, spoon the flour into the measuring cup and level it off with a knife.
- Ignoring Rest Time (Optional): Although no-yeast buns don’t require long proofing, letting the dough rest for 5-10 minutes before shaping can relax the gluten and improve texture.
By keeping these tips and tricks in mind, you’ll consistently bake no-yeast buns that are tender, fluffy, and delicious every time!
Conclusion
Final Thoughts on Quick and Easy Dinner Buns
No-yeast dinner buns are a simple, versatile solution for those who love fresh bread but want to skip the lengthy rise times. Their soft texture, buttery flavor, and quick preparation make them a staple for any occasion, from casual weeknight dinners to special gatherings. With just a handful of pantry staples, you can create warm, delicious buns in under an hour, proving that baking doesn’t have to be complicated to be satisfying.
Encouragement to Experiment and Enjoy
Don’t be afraid to make this recipe your own! Whether you’re adding a savory twist with herbs and cheese or going sweet with a touch of cinnamon and sugar, the possibilities are endless. These no-yeast buns are forgiving, adaptable, and always rewarding. So, grab your ingredients, try out some variations, and enjoy the joy of freshly baked bread made effortlessly. Your family and friends are sure to ask for seconds!
Enhance Your Bread-Making Journey with These Delicious Recipes
If you’re exploring easy and quick bread-making options like No-Yeast Dinner Buns, why stop there? Expand your repertoire with a selection of related recipes that bring diversity to your table. Here are some irresistible recommendations from Second Recipes that pair beautifully with your no-yeast buns or stand as excellent alternatives:
- Brioche Dinner Rolls Recipe: Looking for a yeast-based option with a rich and buttery flavor? These brioche dinner rolls are perfect for special occasions or when you crave a soft, luxurious bread to complement your meals.
- Crescent Roll Breakfast Recipe: For a quick and easy breakfast option, these crescent rolls are ideal. They’re flaky, light, and versatile enough to accompany sweet or savory toppings.
- Sourdough Discard Breakfast Recipe: Have leftover sourdough starter? This recipe transforms it into a creative breakfast bread, offering a tangy flavor twist to your morning routine.
These recipes not only provide a chance to try something new but also enrich your bread-making skills with different techniques and flavors. Dive in and enjoy the journey of crafting delicious bread for every occasion!
Frequently Asked Questions About No-Yeast Dinner Buns
Can I Use Whole Wheat Flour Instead?
Yes, you can use whole wheat flour to make no-yeast dinner buns. However, whole wheat flour tends to be denser than all-purpose flour, which may slightly affect the texture. For a softer result, consider using a mix of whole wheat and all-purpose flour in a 1:1 ratio. You may also need to increase the liquid slightly, as whole wheat flour absorbs more moisture.
What If My Buns Are Too Dense?
Dense buns are often caused by overmixing, overkneading, or using too much flour. To avoid this:
- Mix the dough until just combined, and handle it gently when kneading.
- Check your measurements carefully; using too much flour can make the dough stiff.
- Ensure your baking powder is fresh, as expired leavening agents won’t provide enough lift.
If you’ve followed the recipe but your buns still feel dense, experiment by letting the dough rest for 5-10 minutes before shaping to relax the gluten.
How Long Do No-Yeast Buns Last?
No-yeast buns are best enjoyed fresh on the day they’re baked. However, they can be stored in an airtight container at room temperature for up to 2 days. To extend their freshness:
- Refrigerate them for up to 5 days, but be aware this may dry them out slightly.
- For longer storage, freeze the buns in a freezer-safe bag for up to 3 months. Reheat them in an oven or toaster for that just-baked feel.