I remember the golden, greasy bags of fast food from my childhood in California City. Like many of you, those crispy chicken fingers were the highlight of my week. However, as I grew older and started my culinary journey, I realized that my body didn’t love the heavy oil as much as my taste buds did.
When Stephen and I launched SecondRecipes.com, my mission was clear. I wanted to give these nostalgic favorites a second life. These Baked Chicken Strips represent that philosophy perfectly.
They offer all the crunch and comfort of the original version but with a modern, healthier twist that fits into our busy, balanced lives.
Every time I pull a tray of these Baked Chicken Strips out of the oven, the aroma takes me back to those happy memories, but the light, clean finish keeps me looking forward to the next bite. Food really does tell a story, and this recipe tells the story of how we can honor our past while choosing a better, more vibrant present.
Creating these Baked Chicken Strips was a labor of love in our kitchen. Stephen and I tested countless breading combinations to find the one that stayed crispy without a deep fryer. We discovered that a blend of panko breadcrumbs and the right spices creates a crust that rivals any restaurant version.
When you make these Baked Chicken Strips, you aren’t just making a meal, you are crafting an experience that connects your family around the table. There is something so satisfying about hearing that distinct crunch as your kids or friends take their first bite. These Baked Chicken Strips prove that you do not need to sacrifice flavor or texture to eat well.
They are approachable, simple, and honestly, they just make people happy. Let’s dive into why these Baked Chicken Strips deserve a permanent spot in your weekly dinner rotation.
Why You’ll Love These Baked Chicken Strips
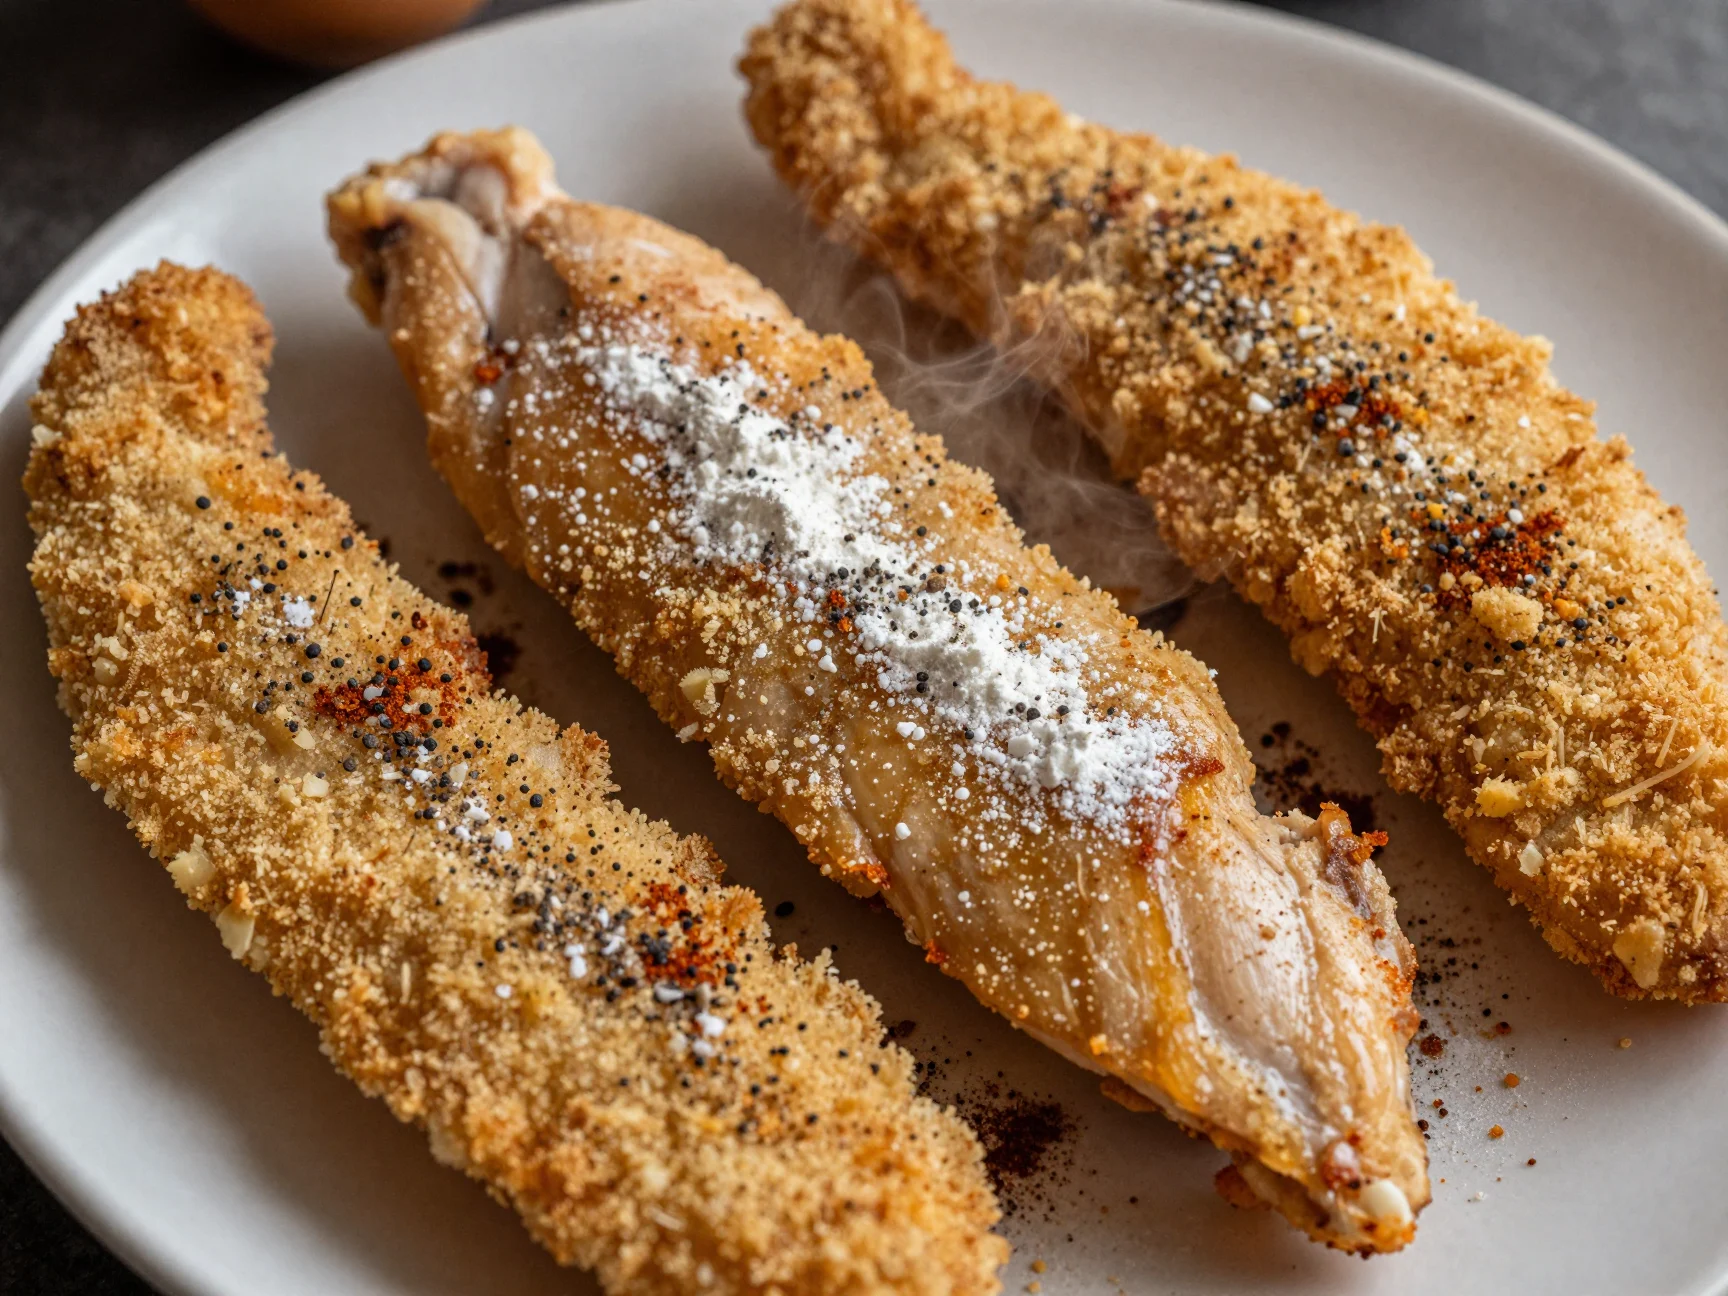
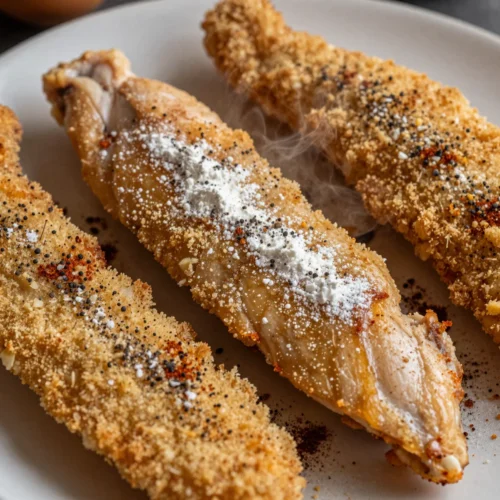
You will absolutely adore these Baked Chicken Strips because they bridge the gap between “healthy” and “crave-worthy.” Often, when we think of baked versions of fried classics, we worry about soggy breading or dry meat. This recipe for Baked Chicken Strips solves both of those problems. We use a high-heat baking method and a clever coating technique to ensure the chicken remains incredibly juicy while the exterior turns a beautiful, shattered-glass gold.
It is the ultimate “second life” for a dish that usually leaves you feeling sluggish. Instead, these Baked Chicken Strips leave you feeling energized and satisfied.
Another reason to love these Baked Chicken Strips is their sheer versatility. Whether you are prepping lunch for the kids, hosting a game day gathering, or just looking for a quick Tuesday night dinner, these Baked Chicken Strips fit the bill. They are also much easier to clean up than fried chicken.
You won’t have to deal with oil splatters on your stove or a heavy scent of frying lingering in your curtains. This version of Baked Chicken Strips keeps your kitchen clean and your heart light. Plus, they are incredibly customizable to your own spice preferences, making them a recipe that grows with you and your family’s tastes.
Ingredients You’ll Need
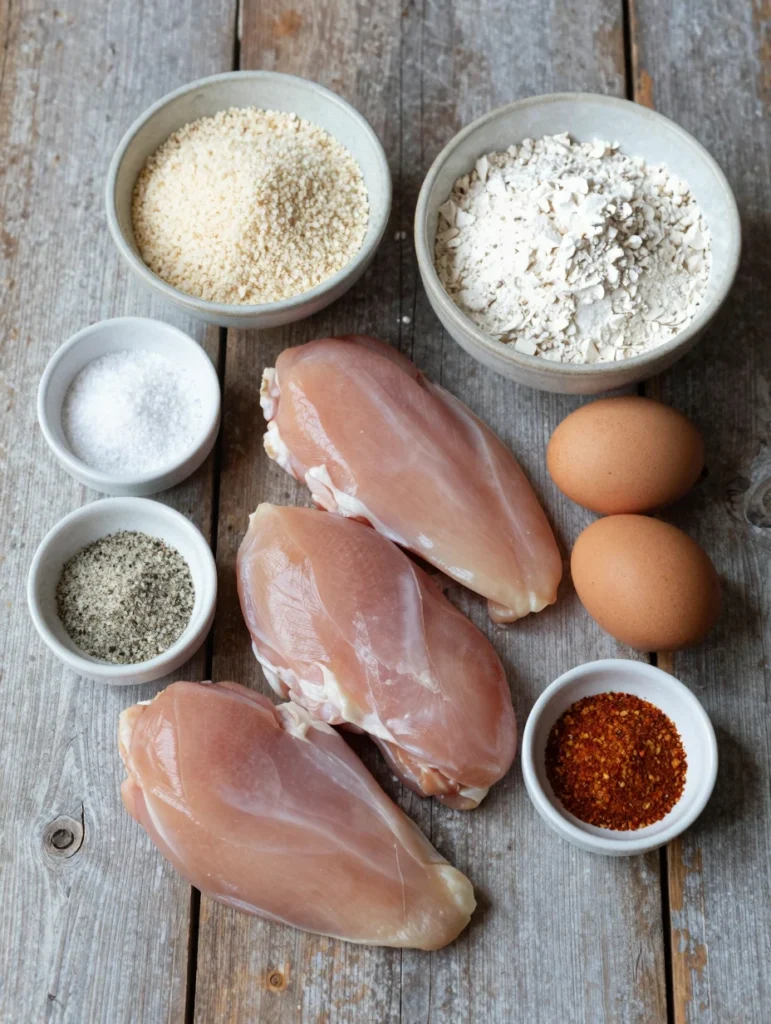
To make the best Baked Chicken Strips you have ever tasted, you need high-quality, simple ingredients. We focus on a three-station breading process that ensures every inch of the chicken is coated in flavor.
The panko is the secret weapon here, as its large, airy flakes create more surface area for crisping up in the oven. When we select chicken for our Baked Chicken Strips, we always look for fresh, organic breasts that we can slice into even pieces for uniform cooking.
| Ingredient | Amount | Purpose |
|---|---|---|
| Chicken Breasts | 1.5 lbs | The protein base for our strips. |
| Panko Breadcrumbs | 2 cups | Provides the essential crunch. |
| All-Purpose Flour | 1/2 cup | Helps the egg wash stick to the meat. |
| Eggs | 2 large | Acts as the “glue” for the breading. |
| Garlic Powder | 1 tbsp | Adds a savory, aromatic depth. |
| Paprika | 1 tsp | Gives the strips a beautiful golden color. |
| Salt and Black Pepper | To taste | Enhances all the other flavors. |
| Olive Oil Spray | As needed | Encourages browning in the oven. |
Substitutions & Variations
I believe that every recipe should be a starting point for your own creativity. If you want to make these Baked Chicken Strips gluten-free, simply swap the flour for an almond flour or a gluten-free all-purpose blend. You can also find gluten-free panko in most grocery stores nowadays.
This ensures that everyone can enjoy Baked Chicken Strips regardless of dietary restrictions. For a spicy kick, I love adding a teaspoon of cayenne pepper or a few shakes of chili flakes to the flour mixture. It transforms the Baked Chicken Strips into a Nashville-inspired treat without the heavy grease.
If you prefer a different protein, this same method works beautifully with turkey tenderloins or even firm tofu. For a “second life” twist on the breading, try crushing up some healthy crackers or even unsweetened cornflakes to replace part of the panko. This adds a different layer of texture to your Baked Chicken Strips.
For a Mediterranean vibe, add dried oregano and lemon zest to the breadcrumbs. The possibilities for these Baked Chicken Strips are truly endless, and Stephen and I encourage you to experiment until you find your own signature version.
If you’re looking to experiment with flavors, consider trying Baked Falafel with Tzatziki for a delightful twist. This recipe can inspire your creativity in the kitchen while keeping things gluten-free.
Step-by-Step Instructions
First, preheat your oven to 425°F (220°C). High heat is crucial for achieving the perfect texture on your Baked Chicken Strips. Line a large baking sheet with parchment paper or place a wire cooling rack on top of the baking sheet. Using a wire rack is my favorite pro tip because it allows hot air to circulate under the chicken, ensuring the Baked Chicken Strips are crispy on all sides.
Second, prepare your dredging stations. Place the flour in one shallow bowl, the beaten eggs in a second bowl, and the panko mixed with garlic powder, paprika, salt, and pepper in a third bowl. Cut your chicken breasts into strips about 1 inch wide.
Pat them dry with paper towels. Drying the meat is a step you cannot skip, as it helps the flour adhere better, which in turn helps the breading stay on your Baked Chicken Strips.
Third, begin the breading process. Take one strip of chicken and dredge it in the flour, shaking off the excess. Dip it into the egg wash, ensuring it is fully submerged.
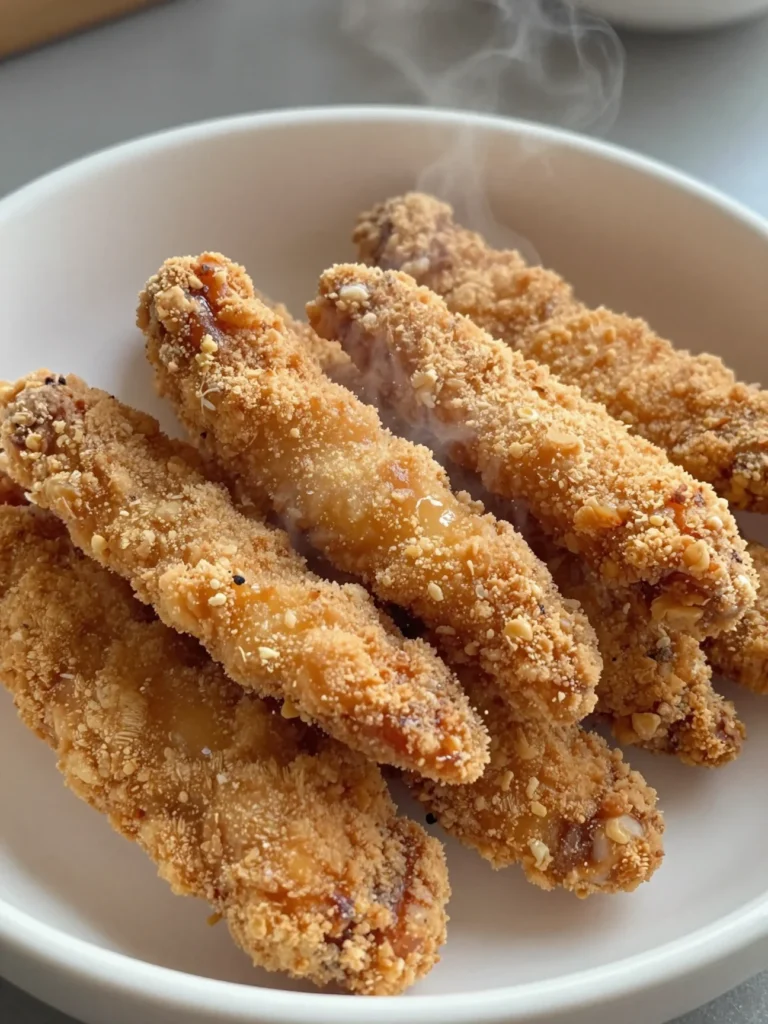
Finally, press the chicken firmly into the panko mixture. You want to make sure the breadcrumbs are packed onto the meat. Place the prepared piece on your rack and repeat the process until all your Baked Chicken Strips are ready for the oven.
Fourth, give the chicken a generous spray with olive oil. This is the secret to getting that deep golden color. Bake the Baked Chicken Strips for 15 to 18 minutes.
Halfway through the cooking time, I like to flip them over and give them another quick spray of oil. This ensures both sides of your Baked Chicken Strips reach peak crunchiness. Once the internal temperature reaches 165°F, remove them from the oven and let them rest for two minutes before serving.
Pro Tips for Success
One of the most important things I have learned as a chef is that details matter. To make truly professional-grade Baked Chicken Strips, do not overcrowd your pan. If the strips are touching, they will steam instead of crisping.
Give each piece of your Baked Chicken Strips at least half an inch of space. This simple adjustment makes a world of difference in the final texture.
Another tip for the ultimate Baked Chicken Strips is to season every layer. Don’t just season the breadcrumbs, add a little salt and pepper to the flour and the egg wash too. This builds a complex profile of flavor that goes all the way through the meat.
If you find your breadcrumbs aren’t browning as much as you’d like, you can actually toast the panko in a dry pan for two minutes before breading the Baked Chicken Strips. This gives them a head start on that beautiful golden hue.
For those who want to elevate their chicken dishes, Baked Lemon Pepper Chicken is a fantastic option. It emphasizes the importance of cooking techniques that can enhance the texture of your meals.
Storage & Reheating Tips
If you happen to have leftovers, these Baked Chicken Strips store quite well. Place them in an airtight container once they have cooled completely to room temperature. They will stay fresh in the refrigerator for up to three or four days.
However, avoid using the microwave for reheating if you want to maintain that signature crunch. Microwaving Baked Chicken Strips often makes the breading soft and chewy, which loses the magic of the dish.
To reheat your Baked Chicken Strips and bring them back to their “second life” glory, use your oven or an air fryer. Place them in a 350°F oven for about 8 to 10 minutes until they are heated through and the exterior crispness returns. If you use an air fryer, 3 to 5 minutes at 375°F usually does the trick.
You can also freeze these Baked Chicken Strips! Just freeze them in a single layer on a tray first, then transfer to a freezer bag. You can bake them straight from frozen, adding an extra 5 to 7 minutes to the cooking time.
What to Serve With This Recipe
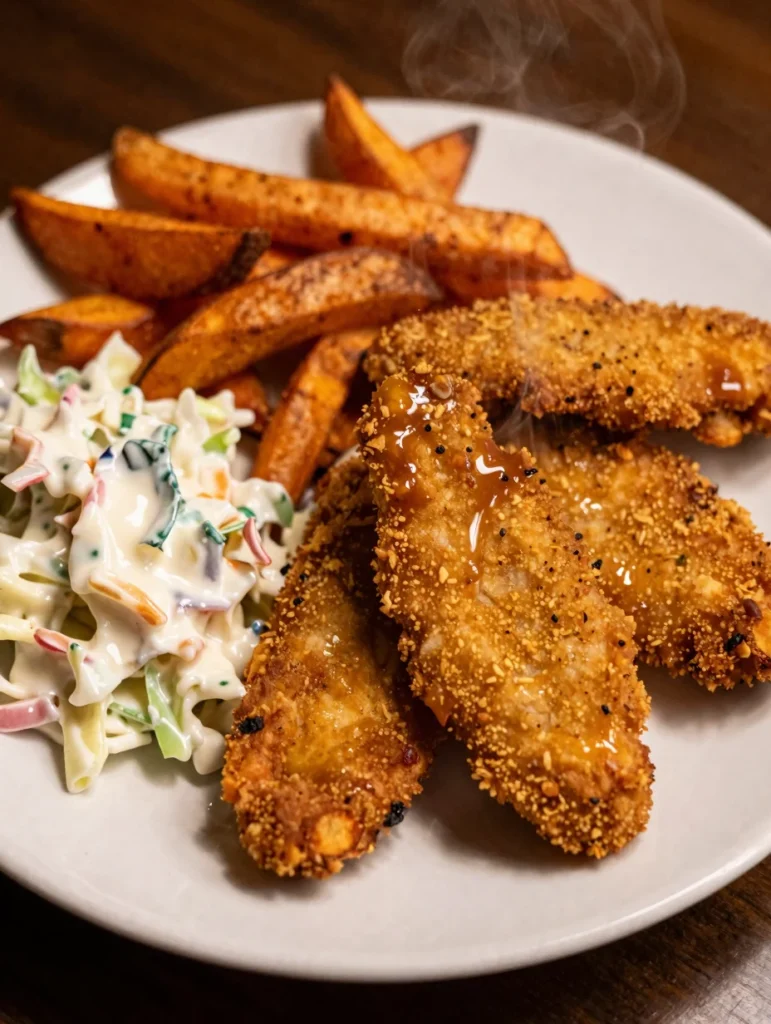
These Baked Chicken Strips are so versatile that they pair well with almost anything. For a classic comfort meal, I love serving them alongside a creamy coleslaw and some sweet potato fries. The sweetness of the potatoes complements the savory spices in the Baked Chicken Strips beautifully. If we are looking for a lighter option, Stephen and I often toss these strips over a giant garden salad with a tangy vinaigrette.
Do not forget the dipping sauces! These Baked Chicken Strips are the perfect vessels for honey mustard, ranch dressing, or a smoky barbecue sauce. For a more sophisticated twist, try a sriracha-mayo or a lemon-herb aioli.
If you are serving these Baked Chicken Strips at a party, I suggest making a “sauce bar” so everyone can customize their own experience. No matter how you serve them, these strips are guaranteed to be the star of the show.
These Baked Chicken Strips are incredibly versatile and can be paired with many sides. For a refreshing change, try serving them with Crispy Baked Fish Tacos for a delightful meal.
FAQs
How long do you bake chicken strips at 425 degrees?
At 425°F, Baked Chicken Strips typically take between 15 and 20 minutes to cook through. The high heat ensures the outside gets crispy while the inside stays tender. Always check the thickest piece with a meat thermometer to ensure it has reached 165°F.
Why are my baked chicken strips not crispy?
If your Baked Chicken Strips are soggy, it is likely due to moisture. Make sure you pat the chicken dry before breading. Also, using a wire rack on your baking sheet is essential for air circulation. Lastly, a quick spray of oil helps the panko fry slightly in the oven’s heat.
Can I make these Baked Chicken Strips in an air fryer?
Absolutely! The air fryer is a fantastic tool for this recipe. Cook the Baked Chicken Strips at 400°F for about 10 to 12 minutes, flipping them halfway through. The concentrated heat of the air fryer makes them exceptionally crunchy.
Is it better to use chicken breast or thighs for strips?
Chicken breasts are traditional for Baked Chicken Strips because they are easy to slice into uniform shapes. However, boneless, skinless chicken thighs can also be used if you prefer a juicier, richer flavor. Just keep in mind that thighs may require a few extra minutes of cooking time.
Can I make the breading ahead of time?
Yes, you can mix your flour and spices or your panko and spices ahead of time and store them in an airtight container. However, do not bread the Baked Chicken Strips until you are ready to bake them, as the breading will become damp if it sits on the raw meat for too long.
Baked chicken strips are a popular dish that combines the crunch of fried chicken with a healthier baking method. They can be enjoyed with various dipping sauces and sides, making them a versatile choice for any meal; learn more about this delicious dish in this article.
Nutrition Information (per serving)
This nutrition information is an estimate based on a serving size of approximately three to four Baked Chicken Strips. We focus on lean protein and mindful portions to keep this recipe balanced and healthy.
| Metric | Amount |
|---|---|
| Calories | 285 kcal |
| Protein | 32g |
| Total Fat | 6g |
| Saturated Fat | 1.5g |
| Carbohydrates | 24g |
| Fiber | 1g |
| Sugar | 1g |
| Sodium | 450mg |
Thank you for letting me share this piece of my heart and kitchen with you. I hope these Baked Chicken Strips bring as much joy and nostalgia to your home as they do to mine. Remember, every meal is an opportunity to tell a new story and give an old favorite a second life. Happy cooking, and I cannot wait to hear how your Baked Chicken Strips turn out!
Baked Chicken Strips
Ingredients
- 1.5 lbs Chicken Breasts
- 2 cups Panko Breadcrumbs
- 1/2 cup All-Purpose Flour
- 2 large Eggs
- 1 tbsp Garlic Powder
- 1 tsp Paprika
- Salt and Black Pepper to taste
- Olive Oil Spray as needed
Instructions
- Preheat your oven to 425°F (220°C) and line a baking sheet with parchment paper or place a wire rack on top.
- Prepare dredging stations: place flour in one bowl, beaten eggs in another, and panko mixed with garlic powder, paprika, salt, and pepper in a third bowl. Cut chicken into strips and pat dry.
- Dredge each chicken strip in flour, dip in egg wash, and press into the panko mixture. Place on the rack and repeat until all strips are coated.
- Spray chicken strips with olive oil and bake for 15 to 18 minutes, flipping halfway through, until golden and cooked through.