I still remember the scent of my grandmother’s kitchen during the peak of California’s strawberry season. She used to stand over a massive copper pot, stirring a mixture that looked more like molten candy than fruit. While those memories are precious, that old-fashioned jam always felt a bit too heavy for my modern palate.
It was packed with so much sugar that you could hardly taste the actual berries. At SecondRecipes.com, Stephen and I believe that every classic deserves a second chance to shine. That is why I spent weeks perfecting this Homemade Strawberry Jam.
I wanted to give this traditional staple a “second life” by focusing on the fruit’s natural brightness and reducing the cloying sweetness. This version is approachable, vibrant, and captures the very essence of a sun-drenched afternoon in California City. When you make your own Homemade Strawberry Jam, you are not just making a condiment, you are preserving a moment in time and connecting with the seasons in a way that store-bought jars simply cannot match.
Cooking is a language of love in our household. Whenever I simmer a batch of Homemade Strawberry Jam, the house fills with a sweet, nostalgic aroma that brings Stephen running to the kitchen with a loaf of crusty bread. This recipe represents our philosophy perfectly.
It is easy enough for a beginner but refined enough for a professional chef. We have stripped away the artificial thickeners and excessive preservatives to create a Homemade Strawberry Jam that tastes like real, honest fruit. Whether you are spreading it on a morning biscuit or gifting a jar to a neighbor, this recipe evokes a sense of comfort and craftsmanship.
It is about taking something simple and making it extraordinary through patience and care. Let us breathe new life into your pantry with a Homemade Strawberry Jam that honors the past while fitting perfectly into your healthy, balanced lifestyle today.
Why You’ll Love This Homemade Strawberry Jam
You will absolutely fall in love with this Homemade Strawberry Jam because it puts you in total control of your ingredients. Most commercial jams rely on high-fructose corn syrup and artificial red dyes to achieve their look and taste. Our recipe uses only four simple, whole-food ingredients.
This ensures that the natural, tart-sweet profile of the berries takes center stage. You will notice a massive difference in flavor depth compared to anything you find on a supermarket shelf. This Homemade Strawberry Jam tastes like a concentrated burst of summer, with a bright acidity from fresh lemon juice that balances the natural sugars beautifully.
Another reason to love this recipe is its versatility and simplicity. You do not need any special canning equipment or commercial pectin to achieve a perfect set. We use the natural pectin found in the fruit and lemon zest to create a soft, spreadable texture that feels luxurious.
This Homemade Strawberry Jam is also much healthier than traditional versions. By slightly reducing the sugar, we allow the strawberries to retain their nutritional integrity and vibrant color. It is a practical, rewarding project that yields a high-quality result every single time. Plus, the satisfaction of hearing that little “pop” of a sealing jar or seeing the ruby-red glow of your own Homemade Strawberry Jam in the sunlight is unmatched.
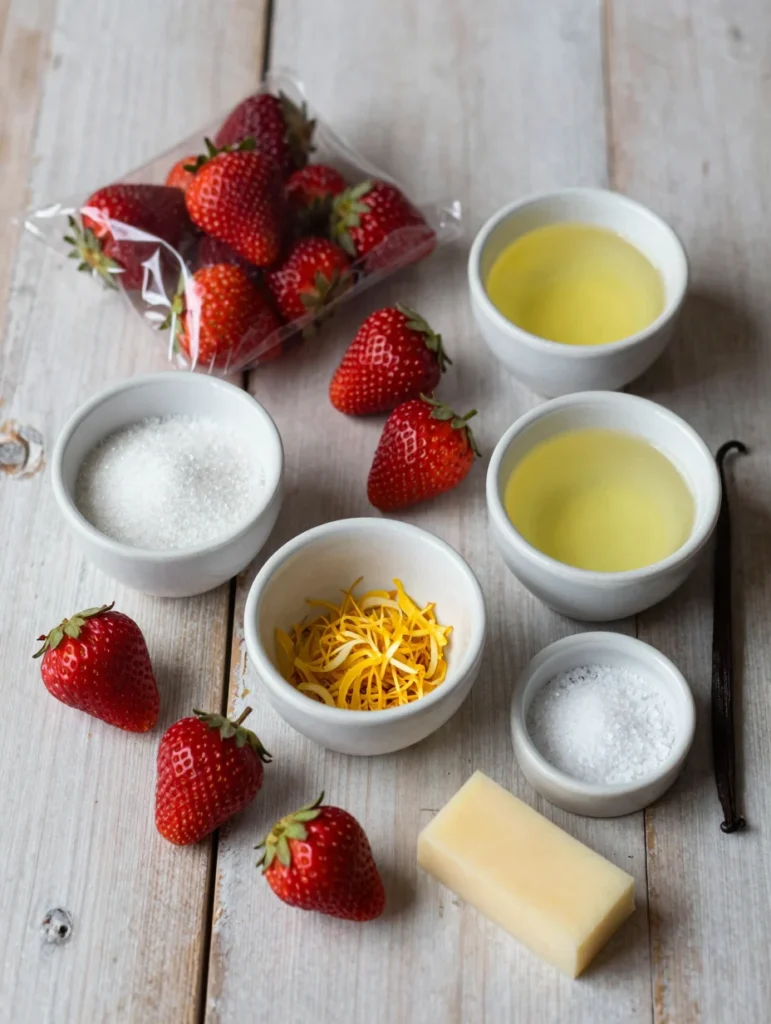
Ingredients You’ll Need
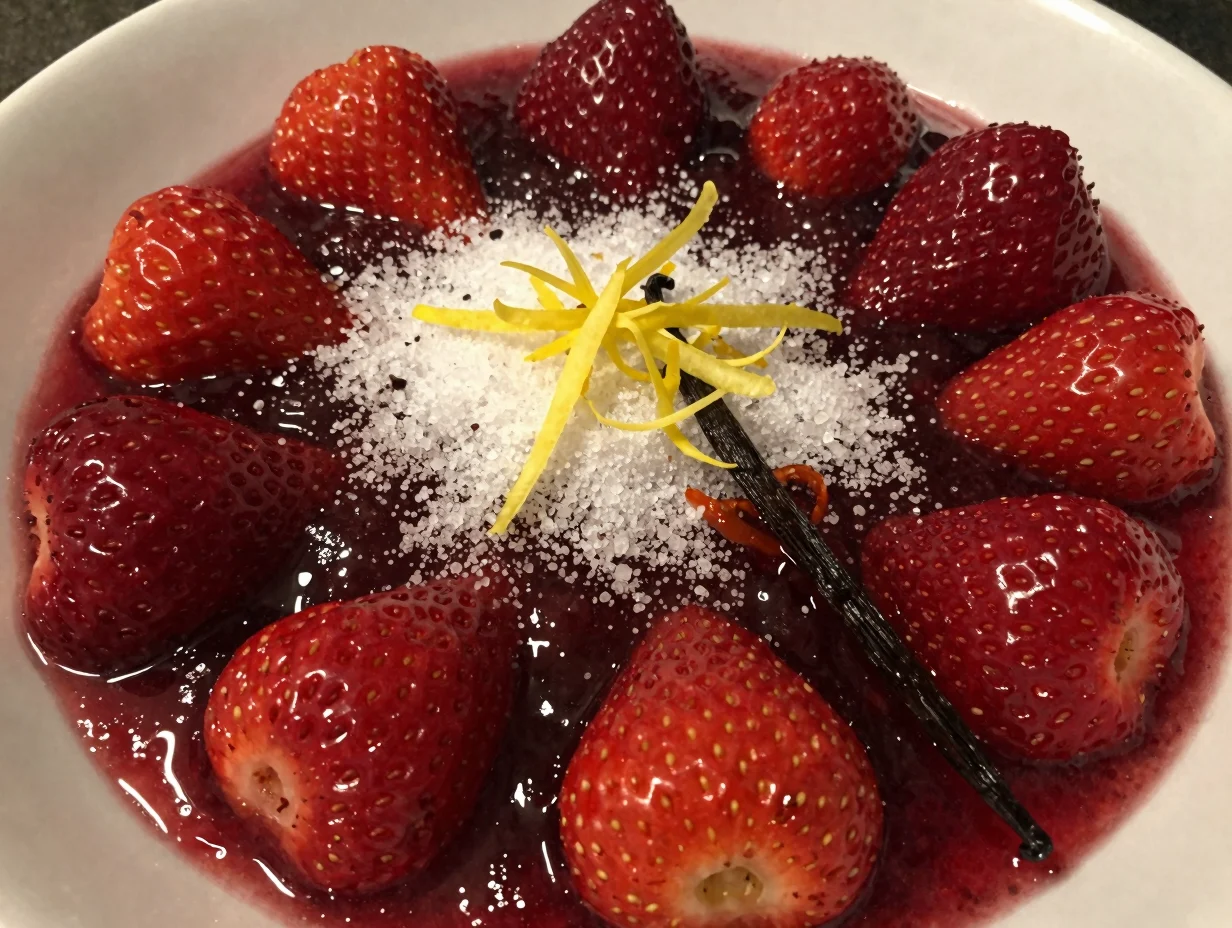
To create the best Homemade Strawberry Jam, you must start with the best produce. Look for strawberries that are deep red all the way through, as these contain the most natural sugar and flavor. While you can use frozen berries in a pinch, fresh, seasonal fruit provides the most superior texture and aroma for your Homemade Strawberry Jam.
| Ingredient | Amount | Purpose |
|---|---|---|
| Fresh Strawberries | 2 lbs (approx. 900g) | The star of the show, providing flavor and base. |
| Granulated Sugar | 1.5 cups | Sweetens and helps the jam set and preserve. |
| Fresh Lemon Juice | 2 tablespoons | Adds acidity to balance sweetness and activate pectin. |
| Lemon Zest | 1 teaspoon | Provides extra natural pectin and a bright citrus note. |
| Fine Sea Salt | 1 pinch | Enhances the natural sweetness of the berries. |
| Vanilla Extract (Optional) | 1/2 teaspoon | Adds a subtle, warm depth to the finish. |
Substitutions & Variations
At SecondRecipes.com, we encourage you to get creative and give your Homemade Strawberry Jam your own personal twist. If you want to avoid refined white sugar, you can substitute it with organic cane sugar or even honey.
Keep in mind that honey will change the flavor profile slightly and may result in a softer set. For a low-carb or “second life” version of this classic, you can try using a sugar substitute like allulose, though the cooking time and preservation qualities will differ significantly from standard Homemade Strawberry Jam.
You can also experiment with flavor infusions to make your Homemade Strawberry Jam unique. Consider adding a tablespoon of finely chopped fresh basil or balsamic vinegar for a sophisticated, savory edge. A splash of rose water can add a delicate floral note that pairs wonderfully with the berries.
If you enjoy a bit of texture, leave half of the strawberries whole during the initial cooking phase. For a smoother Homemade Strawberry Jam, you can use a potato masher or an immersion blender to achieve your desired consistency. Some people even like to add a pinch of black pepper or a cinnamon stick during the simmering process to create a warm, spiced version of this Homemade Strawberry Jam.
At SecondRecipes.com, we encourage you to get creative and give your Homemade Strawberry Jam your own personal twist. If you’re looking for a refreshing dessert option, consider trying our Homemade Peach Ice Cream for a delightful pairing.
Step-by-Step Instructions
First, prepare your fruit. Wash the strawberries thoroughly under cold water and pat them dry. Remove the green hulls and slice the berries into halves or quarters.
If the strawberries are particularly large, cut them into smaller pieces to ensure they cook down evenly. Place the sliced fruit into a large, heavy-bottomed pot. Using a heavy pot is crucial for making Homemade Strawberry Jam because it distributes heat evenly and prevents the sugar from scorching on the bottom.
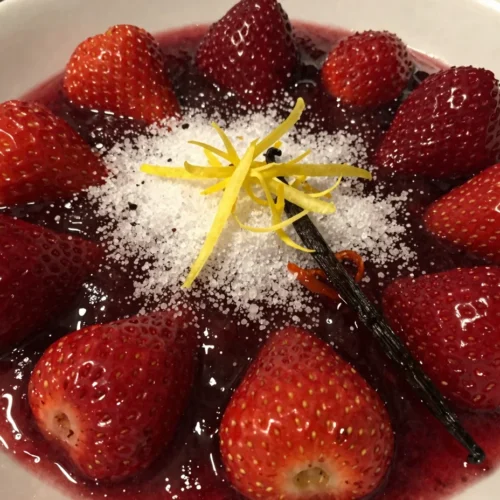
Next, add the sugar, lemon juice, lemon zest, and a pinch of salt to the pot. Stir the mixture well so the strawberries are completely coated. Let the fruit macerate for at least 30 minutes at room temperature.
This process allows the sugar to draw out the juices from the berries, creating a natural syrup. You will see the fruit begin to soften and release a beautiful, deep red liquid. This step is essential for a high-quality Homemade Strawberry Jam as it jumpstarts the cooking process and intensifies the flavor.
Place the pot over medium-high heat and bring the mixture to a rolling boil. Stir frequently with a wooden spoon or a heat-resistant spatula. As the Homemade Strawberry Jam boils, you may see a bit of foam rising to the top.
You can skim this off with a spoon if you want a crystal-clear jam, or leave it in for a more rustic look. Continue to boil the mixture, stirring often to prevent sticking, until it reaches the “gel point.” This usually takes about 15 to 20 minutes of vigorous boiling. The jam will look glossy and thick, and the bubbles will become larger and slower.
To check if your Homemade Strawberry Jam is ready, use the “cold plate test.” Place a small spoon of the hot jam onto a chilled saucer from the freezer. Let it sit for a minute, then push the edge of the jam with your finger. If it wrinkles and holds its shape, it is ready.
If it is still runny, boil it for another two minutes and test again. Once you achieve the perfect set, remove the pot from the heat and stir in the vanilla extract if you are using it. Allow the Homemade Strawberry Jam to cool in the pot for about 10 minutes before transferring it to sterilized glass jars. Leave a little bit of headspace at the top of each jar, then seal them tightly.
Pro Tips for Success

Achieving the perfect Homemade Strawberry Jam requires a bit of intuition and a few chef secrets. First, always use a pot that is much larger than you think you need. When the jam reaches a full boil, it can foam up and double in volume quickly.
A large pot prevents messy boil-overs and allows for faster evaporation, which helps the jam set without overcooking the fruit. Overcooking can lead to a dark, caramelized flavor and a rubbery texture, so keep a close eye on the pot during the final stages of your Homemade Strawberry Jam journey.
Another tip involves the lemon. Do not skip the lemon juice or the zest! The acidity is what interacts with the natural pectin in the strawberries to create that perfect gel.
Without it, your Homemade Strawberry Jam might remain a runny syrup. If you prefer a very firm jam, you can add a few slightly under-ripe strawberries to the mix. Under-ripe fruit contains more natural pectin than fully ripe fruit.
Finally, be patient. The Homemade Strawberry Jam will continue to thicken significantly as it cools in the jars. Do not be tempted to keep boiling it if it passes the cold plate test, even if it looks a bit liquid in the pot.
Achieving the perfect Homemade Strawberry Jam requires a bit of intuition and a few chef secrets. To complement your jam-making skills, check out our tips for making Homemade Twix Bites for a sweet treat.
Storage & Reheating Tips
Proper storage ensures that your Homemade Strawberry Jam stays fresh and delicious for as long as possible. If you are not using a traditional water-bath canning method, you must store your jars in the refrigerator. In the fridge, this Homemade Strawberry Jam will stay fresh for up to three to four weeks.
Always use a clean spoon when scooping jam out of the jar to prevent cross-contamination, which can lead to mold growth. The cold temperature of the refrigerator helps maintain the vibrant color and prevents the flavors from dulling.
For longer storage, you can freeze your Homemade Strawberry Jam. Ensure you use freezer-safe jars and leave at least an inch of headspace to allow for expansion as the jam freezes. It will last in the freezer for up to six months.
When you are ready to use it, thaw the jar in the refrigerator overnight. If you find that your Homemade Strawberry Jam has become too firm in the fridge, you can gently reheat a small portion in the microwave for 5 to 10 seconds to make it more spreadable. Avoid reheating the entire jar multiple times, as this can degrade the quality and texture of the fruit over time.
What to Serve With This Recipe
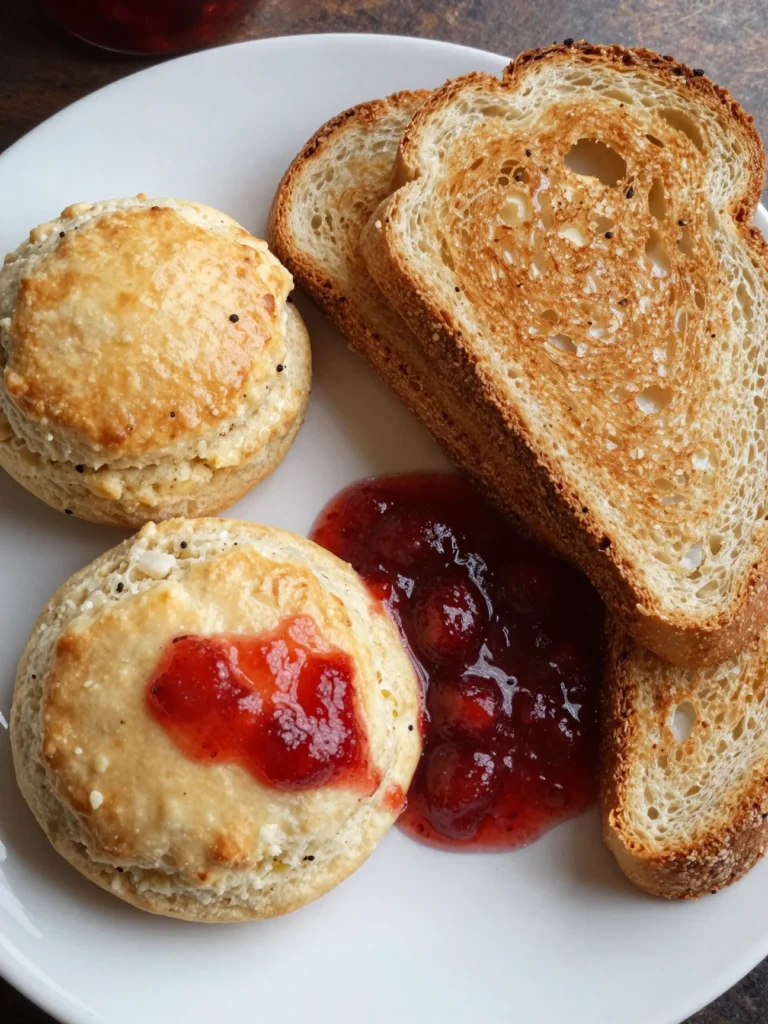
The beauty of Homemade Strawberry Jam lies in its ability to elevate almost any dish. For a classic breakfast, serve it atop warm, buttery scones or thick slices of brioche toast. It is also the perfect companion for a bowl of Greek yogurt topped with crunchy granola.
At SecondRecipes.com, Stephen and I love using this Homemade Strawberry Jam as a filling for crepes or as a topping for sourdough pancakes. The bright acidity of the jam cuts through the richness of the dairy perfectly, creating a balanced and satisfying morning meal.
Beyond breakfast, this Homemade Strawberry Jam shines in desserts and even savory applications. Use it as a swirl in a cheesecake batter or as a topping for vanilla bean ice cream. You can also use it to sandwich together delicate shortbread cookies or as a glaze for a fruit tart.
On the savory side, try pairing this Homemade Strawberry Jam with a sharp white cheddar or creamy brie on a charcuterie board. The sweetness of the berries complements the saltiness of the cheese in a way that feels incredibly gourmet. It also makes a fantastic base for a vinaigrette when whisked with olive oil and a bit of mustard.
The beauty of Homemade Strawberry Jam lies in its ability to elevate almost any dish. For a delicious breakfast option, try our recipe for Homemade Biscuits Gravy to enjoy alongside your jam.
FAQs
How do you thicken strawberry jam without pectin?
You can thicken Homemade Strawberry Jam without commercial pectin by using fresh lemon juice and zest. The natural acidity and pectin in the lemon, combined with the natural pectin in the strawberries, create a set when boiled with enough sugar. Reducing the liquid through steady boiling also thickens the mixture naturally.
Can I use frozen strawberries?
Yes, you can use frozen berries for Homemade Strawberry Jam. Thaw them slightly before cooking and include any liquid that escapes during the thawing process. Frozen berries often break down faster, so your jam might have a smoother consistency than if you used fresh fruit.
How long does homemade jam last in the fridge?
If the jars are properly sterilized and kept sealed, Homemade Strawberry Jam typically lasts for three to four weeks in the refrigerator. Because this recipe uses less sugar and no artificial preservatives, it does not have the multi-year shelf life of store-bought versions unless you use professional canning techniques.
Why is my strawberry jam runny?
Runny Homemade Strawberry Jam usually happens if it was not boiled long enough to reach the gel point (220°F or 105°C) or if there was not enough acidity. You can fix this by pouring the jam back into a pot, adding a little more lemon juice, and boiling it again for a few minutes until it passes the cold plate test.
Can I reduce the sugar in this recipe?
You can reduce the sugar in Homemade Strawberry Jam, but it will affect the set and the shelf life. Sugar acts as a preservative and a structural element. If you reduce it significantly, the jam will be thinner and will only last about a week in the fridge, or you may need to add chia seeds to help it thicken.
Making your own strawberry jam allows you to enjoy the fresh taste of strawberries while controlling the sweetness and ingredients. This process not only preserves the fruit but also connects you to the seasonal bounty of nature, making it a cherished culinary tradition that many enjoy during the summer months. For more information, visit this Jam page.
Nutrition Information (per serving)
This Homemade Strawberry Jam is a wonderful way to enjoy the benefits of fruit with a controlled amount of added sugar. Strawberries provide Vitamin C and antioxidants, making this a much better choice than processed spreads. One serving is approximately one tablespoon.
| Nutrient | Amount |
|---|---|
| Calories | 45 kcal |
| Total Fat | 0g |
| Sodium | 2mg |
| Total Carbohydrates | 11g |
| Sugars | 10g |
| Vitamin C | 8% DV |
Making your own Homemade Strawberry Jam is a rewarding experience that connects you to the ingredients and the process of cooking. It is a simple joy that yields delicious results. I hope this recipe brings a little bit of California sunshine and a “second life” to your kitchen table. Happy cooking from SecondRecipes.com!
Homemade Strawberry Jam
Ingredients
- 2 lbs fresh strawberries
- 1.5 cups granulated sugar
- 2 tablespoons fresh lemon juice
- 1 teaspoon lemon zest
- 1 pinch fine sea salt
- 1/2 teaspoon vanilla extract (optional)
Instructions
- Wash the strawberries thoroughly, remove the green hulls, and slice them into halves or quarters.
- Place the sliced strawberries in a large pot and add sugar, lemon juice, lemon zest, and salt. Stir well and let macerate for 30 minutes.
- Bring the mixture to a rolling boil over medium-high heat, stirring frequently. Boil for 15-20 minutes until it reaches the gel point.
- Perform the cold plate test to check if the jam is ready. If it wrinkles when pushed, it's done.
- Remove from heat, stir in vanilla extract if using, and let cool for 10 minutes before transferring to sterilized jars.