Whenever I walk through the vibrant farmers markets here in California City, the bright colors of seasonal berries and stone fruits always stop me in my tracks. These moments remind me of my early days in culinary school, where I first learned the art of the classic French pâtisserie. Back then, everything felt so complicated and rigid.
I remember sweating over a tempering bowl of chocolate or worrying about the exact millimeter of a pastry crust. But as I grew as a chef and started SecondRecipes.com, I realized that the best food does not have to be stressful. It should tell a story of joy and connection.
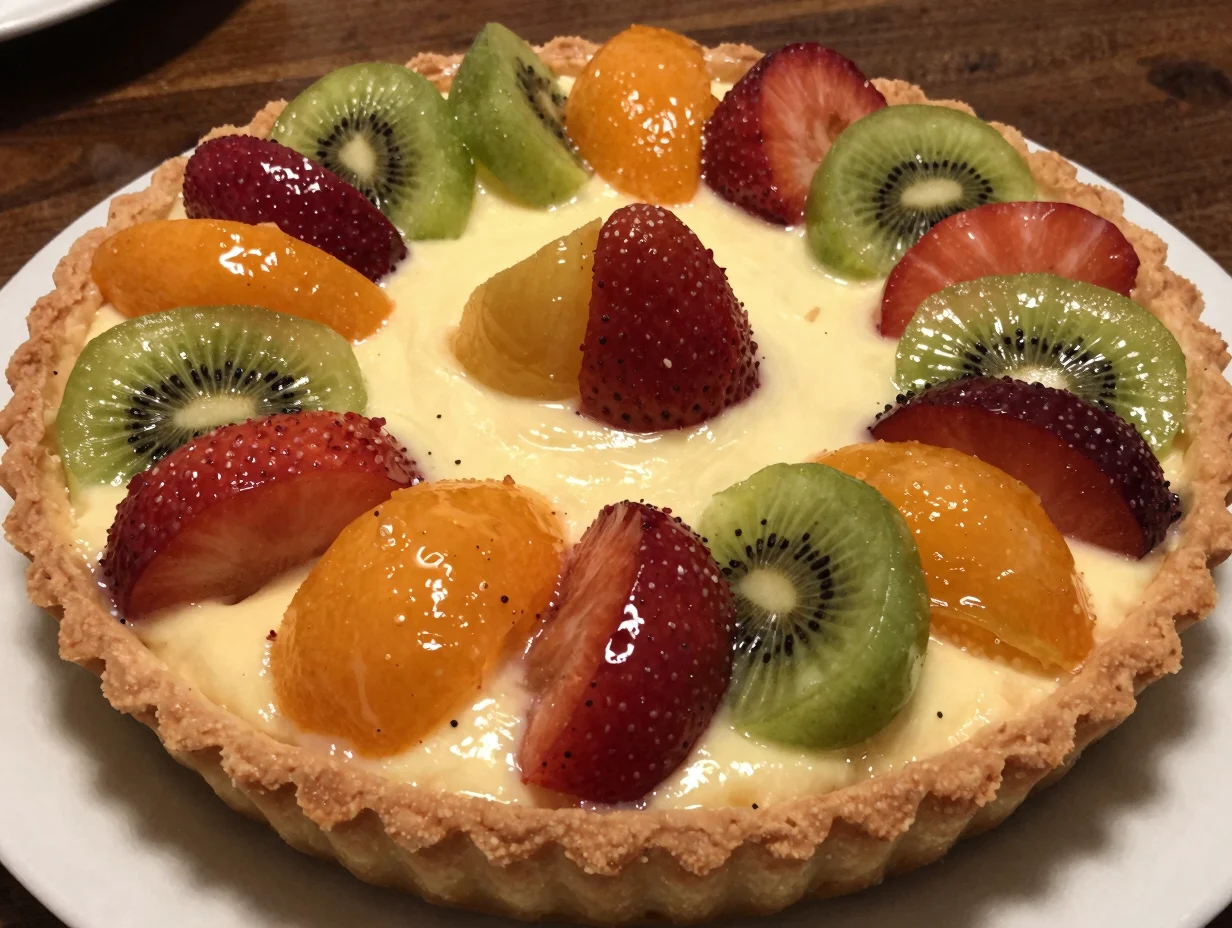
That is how this Simple Fruit Tart came to be. My husband, Stephen, and I wanted to take that intimidating, high-end bakery dessert and give it a “second life.” We stripped away the fuss and kept the elegance. This Simple Fruit Tart represents our philosophy perfectly.
It is a modern, approachable version of a timeless classic that focuses on fresh flavors and a stress-free process. We believe everyone deserves to serve a showstopper dessert without spending the entire day in the kitchen. This Simple Fruit Tart uses a buttery, shortbread-style crust and a silky, light cream filling that highlights whatever fruit is currently in season.
For Stephen and me, the kitchen is the heart of the home. We often spend our Sunday afternoons testing ways to make traditional recipes more balanced and manageable for busy families. When we perfected this Simple Fruit Tart, we knew we had something special.
The crust is crisp, the filling is luscious but not overly sweet, and the fruit provides a natural, tart brightness. It is the kind of recipe that makes people think you studied in Paris, even if you just whipped it up in your own kitchen while sipping on some iced tea. This Simple Fruit Tart is more than just a recipe, it is a way to celebrate the bounty of nature with the people you love.
Whether you are hosting a backyard brunch or looking for a light finish to a heavy dinner, this Simple Fruit Tart fits every occasion. We invite you to embrace the simplicity and find your own rhythm in the kitchen with this dish. Let’s give this classic dessert a second life together.
Why You’ll Love This Simple Fruit Tart
You will absolutely adore this Simple Fruit Tart because it balances indulgence with freshness. Many traditional tarts rely on heavy custards that can feel a bit weighed down, but our version uses a lighter cream base that lets the fruit shine. The contrast between the crunchy, sandy texture of the crust and the velvet-smooth filling creates a sensory experience that is hard to beat.
Another reason to love this Simple Fruit Tart is its incredible versatility. You can use strawberries in the spring, peaches in the summer, or even thinly sliced pears in the fall. It is a canvas for your creativity.
Furthermore, this Simple Fruit Tart is surprisingly easy to handle. We have simplified the crust method so you do not have to worry about complicated rolling techniques or dough shrinkage. It is a reliable, foolproof recipe that delivers professional results every single time. If you appreciate honest ingredients and clear instructions, this Simple Fruit Tart will quickly become a staple in your dessert repertoire.
Ingredients You’ll Need
To create the perfect Simple Fruit Tart, you need high-quality ingredients that work in harmony. We focus on pantry staples for the base and the freshest possible produce for the topping. Using real butter and pure vanilla extract makes a significant difference in the final flavor profile of your Simple Fruit Tart. Here is what you will need to gather before you start.
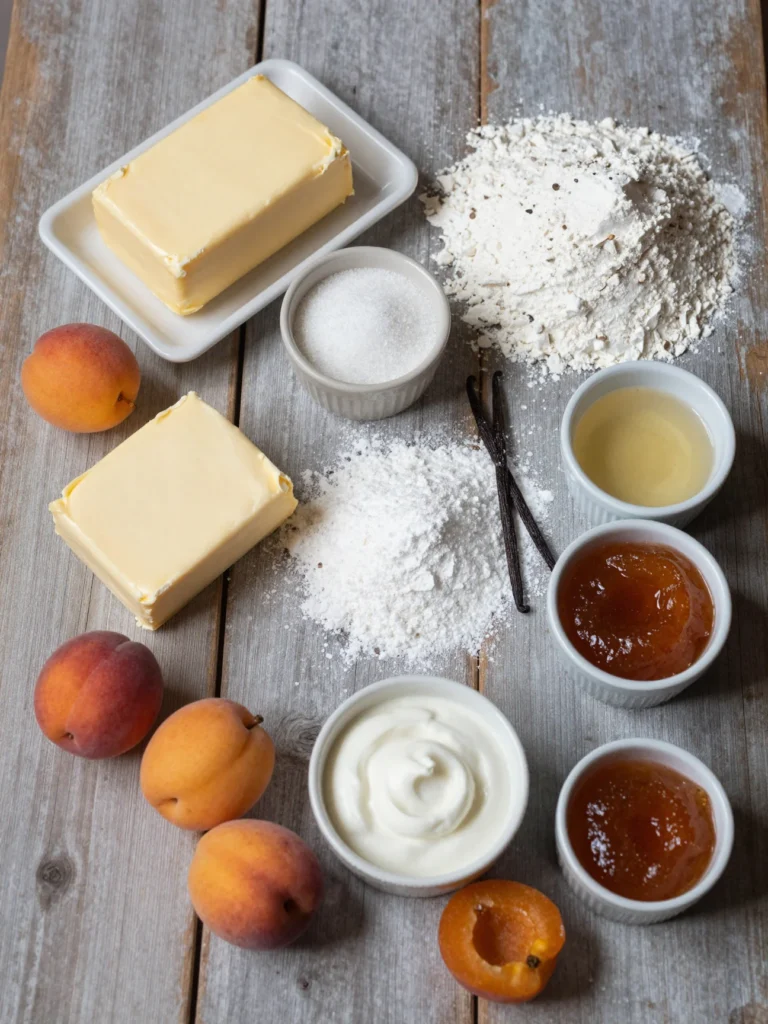
| Category | Ingredient | Amount |
|---|---|---|
| Crust | Unsalted Butter (melted) | 1/2 cup |
| Crust | Granulated Sugar | 1/4 cup |
| Crust | Vanilla Extract | 1/2 tsp |
| Crust | All-Purpose Flour | 1 cup |
| Crust | Salt | 1/4 tsp |
| Filling | Cream Cheese (softened) | 8 oz |
| Filling | Powdered Sugar | 1/2 cup |
| Filling | Greek Yogurt (plain) | 1/4 cup |
| Filling | Vanilla Bean Paste or Extract | 1 tsp |
| Topping | Assorted Fresh Fruit | 3 cups |
| Topping | Apricot Preserves (for glaze) | 2 tbsp |
Substitutions & Variations
One of the best things about a Simple Fruit Tart is how easily you can adapt it to your dietary needs or seasonal cravings. If you want a gluten-free version, you can swap the all-purpose flour for a high-quality 1:1 gluten-free baking blend. For a dairy-free Simple Fruit Tart, use a plant-based butter substitute in the crust and a vegan cream cheese and coconut yogurt for the filling.
These changes preserve the integrity of the dish while making it accessible for everyone at your table. If you want to experiment with flavors, try adding a teaspoon of lemon zest to the crust for a bright, citrusy note. You can also change the filling of your Simple Fruit Tart by stirring in a tablespoon of cocoa powder for a chocolatey base or a hint of almond extract for a nutty aroma.
Regarding the fruit, do not feel limited to berries. Mango, kiwi, and pomegranate seeds add a tropical flair that transforms the Simple Fruit Tart into something entirely new. We always encourage curiosity in the kitchen, so feel free to mix and match until you find your favorite combination.
One of the best things about a Simple Fruit Tart is how easily you can adapt it to your dietary needs or seasonal cravings. If you’re looking for a healthy option, consider trying a Simple Avocado Chicken Salad for a refreshing side dish that complements the tart perfectly. Simple Avocado Chicken Salad
Step-by-Step Instructions
Creating this Simple Fruit Tart is a rewarding process that we have broken down into easy, manageable steps. Follow these instructions to ensure your tart looks as good as it tastes.
Step 1: Prepare the Crust
Start by preheating your oven to 350 degrees Fahrenheit. In a medium bowl, whisk together the melted butter, granulated sugar, and vanilla extract. Gradually fold in the flour and salt until a soft dough forms.
Press this dough evenly into the bottom and up the sides of a 9-inch tart pan with a removable bottom. Use the back of a spoon or your fingers to make sure the thickness is consistent throughout. Prick the bottom of the crust with a fork to prevent air bubbles.
Step 2: Bake and Cool
Place the tart pan on a baking sheet and bake for 15 to 18 minutes. You are looking for a light golden brown color. Once finished, remove the crust from the oven and let it cool completely on a wire rack. It is vital that the crust is cold before you add the filling to your Simple Fruit Tart, otherwise, the cream may melt or become runny.
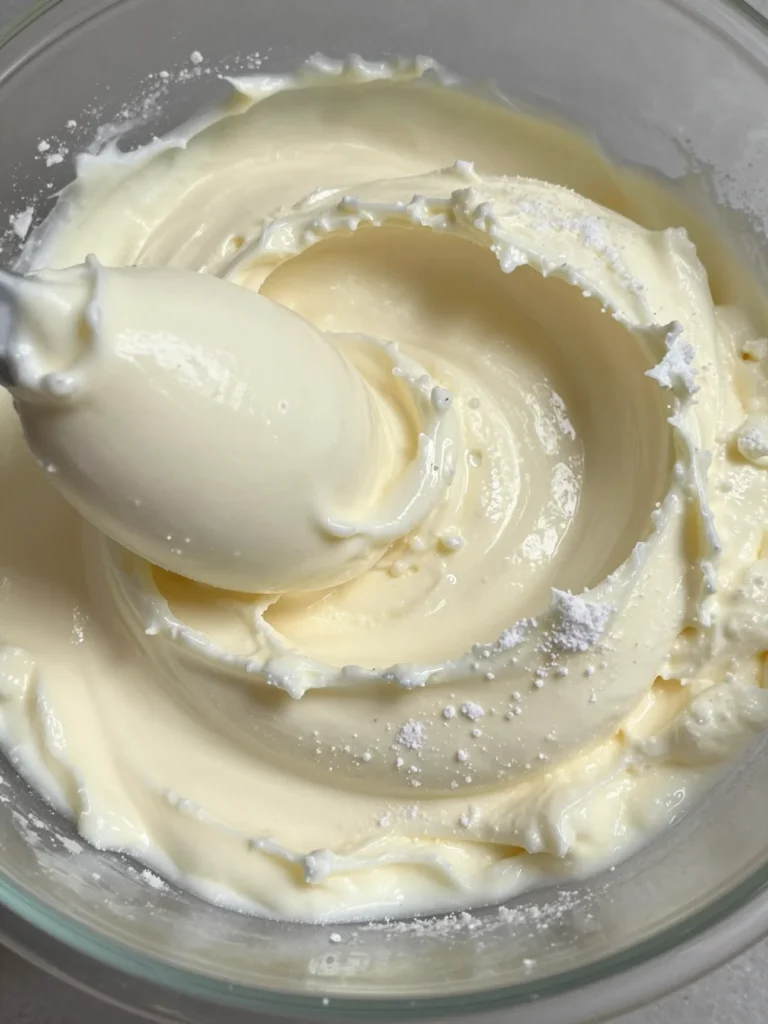
Step 3: Whip the Filling
While the crust cools, prepare the luscious filling for your Simple Fruit Tart. In a large mixing bowl, beat the softened cream cheese and powdered sugar together until the mixture is smooth and fluffy. Add the Greek yogurt and vanilla.
Continue beating until everything is well combined and aerated. The yogurt adds a nice tang that balances the sweetness of the fruit.
Step 4: Assemble the Base
Once the crust is entirely cool, spread the cream cheese mixture evenly over the bottom. Use an offset spatula to create a flat, smooth surface. This layer acts as the “glue” for your beautiful fruit decorations. At this stage, your Simple Fruit Tart is almost ready for its crowning glory.
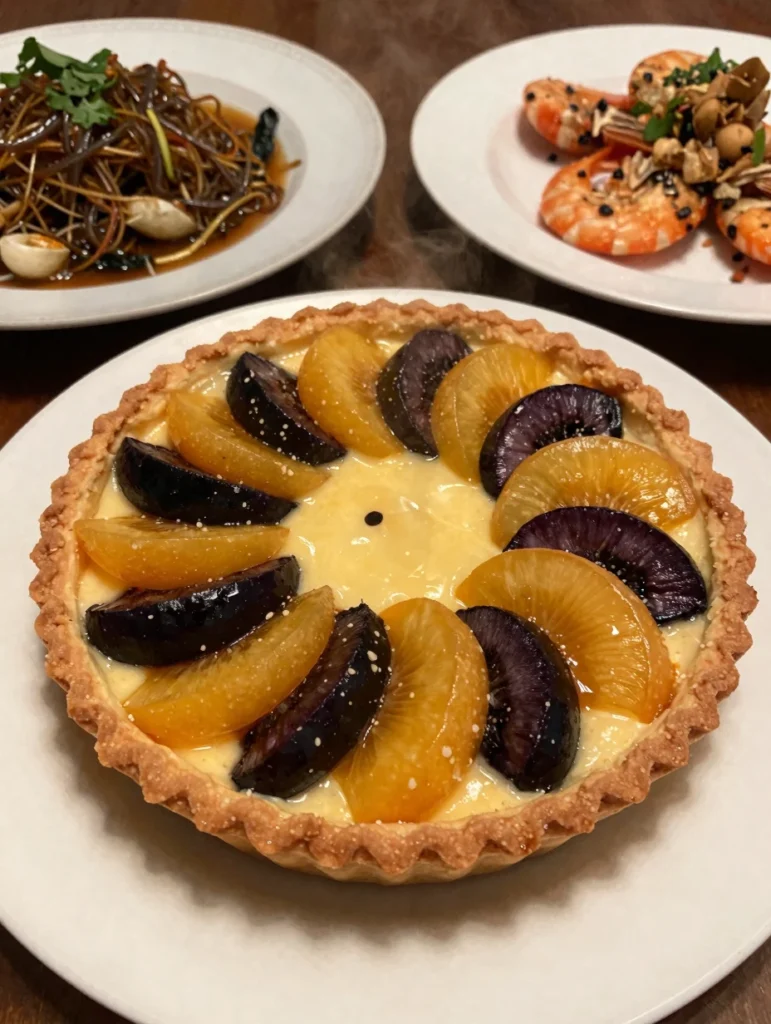
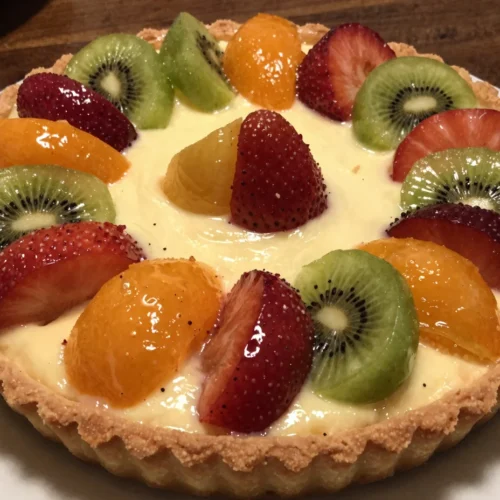
Step 5: Decorate with Fruit
Now comes the creative part of making a Simple Fruit Tart. Arrange your sliced fruit in concentric circles, starting from the outside and working your way in. You can mix colors for a rainbow effect or stick to a single type of berry for a monochromatic look. Press the fruit gently into the cream filling so it stays in place.
Step 6: Glaze and Chill
To give your Simple Fruit Tart that professional bakery shine, warm the apricot preserves in a small microwave-safe bowl for about 15 seconds. Strain out any large chunks and lightly brush the liquid over the fruit. This glaze protects the fruit from drying out and adds a lovely shimmer. Chill the Simple Fruit Tart in the refrigerator for at least one hour before serving to let the flavors meld and the filling set.
Pro Tips for Success
To ensure your Simple Fruit Tart turns out perfectly every time, we have gathered a few insider tips from our years of testing recipes at SecondRecipes.com. First, always use room temperature cream cheese for the filling. This prevents lumps and ensures a silky texture.
If you are in a rush, you can soften the cheese by placing the sealed wrapper in a bowl of warm water for a few minutes. Second, when you are pressing the dough into the pan, pay extra attention to the corners where the bottom meets the sides. This area tends to get too thick if you are not careful. A thinner, even crust makes for a much better Simple Fruit Tart experience.
Third, wait until the very last minute to add the fruit if you are making this for a party. While the crust and filling can be prepared ahead of time, some fruits like strawberries can release juice over time, which might slightly discolor the cream. Fourth, for the best slices, use a sharp, thin-bladed knife and wipe it clean between every single cut.
This keeps the edges of your Simple Fruit Tart neat and presentable. Finally, don’t be afraid to get creative with the glaze. If you don’t have apricot preserves, apple jelly works just as well. These small details are what elevate a good Simple Fruit Tart into a truly great one.
To ensure your Simple Fruit Tart turns out perfectly every time, we have gathered a few insider tips from our years of testing recipes at SecondRecipes.com. For more delightful dessert ideas, check out our Simple No-Bake Eclair Cake: An Old-Fashioned Favorite Made Easy, which is just as simple and delicious. Simple No-Bake Eclair Cake
Storage & Reheating Tips
A Simple Fruit Tart is best enjoyed the day it is made because that is when the crust is at its crispiest. However, if you have leftovers, you can store them in an airtight container in the refrigerator for up to two days. Keep in mind that the crust will naturally soften as it absorbs moisture from the filling and the fruit.
We do not recommend freezing a Simple Fruit Tart, as the texture of the fresh fruit and the cream filling will change significantly once thawed. If you want to prep in advance, you can bake the crust a day early and keep it in a sealed container at room temperature. You can also whip up the filling and keep it refrigerated.
Assemble the Simple Fruit Tart a few hours before you plan to serve it for the best results. Since this is a cold dessert, no reheating is required. Just take it out of the fridge and enjoy the cool, refreshing flavors.
What to Serve With This Recipe
This Simple Fruit Tart is a star on its own, but pairing it with the right beverage or side can make the experience even better. For a morning or afternoon treat, serve a slice of Simple Fruit Tart alongside a hot cup of Earl Grey tea or a light roast coffee. The floral notes in the tea complement the fresh berries beautifully.
If you are serving this Simple Fruit Tart as a dessert for a dinner party, a glass of chilled Prosecco or a sweet Moscato d’Asti works wonderfully. The bubbles cut through the richness of the cream cheese filling.
For a truly indulgent experience, you could add a small dollop of homemade whipped cream or a scoop of vanilla bean ice cream on the side. If you want to keep things light and healthy, a simple side of fresh mint leaves or a splash of lime juice over the tart can enhance the natural vibrancy of the fruit.
No matter how you choose to serve it, this Simple Fruit Tart is guaranteed to bring a smile to everyone’s face. It is a celebratory dish that feels light enough for a hot summer day but satisfying enough for a special occasion.
This Simple Fruit Tart is a star on its own, but pairing it with the right beverage or side can make the experience even better. For a savory complement, try our Butter Garlic Noodles Recipe: Simple, Flavorful, and Irresistible, which balances the sweetness of the tart beautifully. Butter Garlic Noodles
FAQs
Can I use frozen fruit for a Simple Fruit Tart?
We highly recommend using fresh fruit for this recipe. Frozen fruit tends to release a lot of moisture as it thaws, which can make the cream filling runny and the crust soggy. For a Simple Fruit Tart that looks and tastes its best, stick to seasonal, fresh produce.
How do I prevent the crust from shrinking?
To prevent your Simple Fruit Tart crust from shrinking, make sure you don’t overwork the dough. Overworking develops gluten, which causes the dough to pull back. Also, ensure the dough is pressed firmly and evenly into the pan. If your kitchen is very warm, chill the pressed crust in the fridge for 15 minutes before baking.
What is the best way to remove the tart from the pan?
The easiest way to remove your Simple Fruit Tart is to use a pan with a removable bottom. Once the tart is chilled and set, place the pan on top of a sturdy tall glass or a small bowl. Gently slide the outer ring down. Then, you can carefully slide the tart off the metal base onto a serving platter.
Can I make the filling without cream cheese?
Yes, if you prefer a different base for your Simple Fruit Tart, you can use a traditional pastry cream (creme patissiere) or even a thick Greek yogurt sweetened with honey. However, the cream cheese provides a stable structure that helps the fruit stay in place and gives the tart a cheesecake-like richness.
How long does a Simple Fruit Tart stay fresh?
While it is safe to eat for up to 48 hours when refrigerated, a Simple Fruit Tart is at its peak within 6 to 8 hours of assembly. After this point, the moisture from the fruit and cream will begin to soften the shortbread crust. Always keep it chilled until you are ready to serve.
A Simple Fruit Tart is a delightful dessert that showcases seasonal fruits atop a creamy filling and a buttery crust. This classic pastry can be enjoyed in various forms and is often associated with French cuisine, making it a popular choice for gatherings and celebrations. For more information, visit this tart article.
Nutrition Information (per serving)
This Simple Fruit Tart provides a balanced treat that satisfies your sweet tooth while offering some nutrients from the fresh fruit. Here is a general breakdown of the nutritional content per serving, based on a 9-inch tart cut into 8 slices.
| Nutrient | Amount per Serving |
|---|---|
| Calories | 310 kcal |
| Total Fat | 18g |
| Saturated Fat | 11g |
| Cholesterol | 45mg |
| Sodium | 160mg |
| Total Carbohydrates | 34g |
| Dietary Fiber | 2g |
| Sugars | 19g |
| Protein | 4g |
We hope this Simple Fruit Tart brings as much joy to your home as it does to ours at SecondRecipes.com. Cooking is about the journey and the memories you create along the way. By choosing simple, wholesome ingredients and giving a classic recipe a second life, you are creating something truly meaningful. Happy baking from Stephen and me!
Simple Fruit Tart
Ingredients
- 1/2 cup unsalted butter (melted)
- 1/4 cup granulated sugar
- 1/2 tsp vanilla extract
- 1 cup all-purpose flour
- 1/4 tsp salt
- 8 oz cream cheese (softened)
- 1/2 cup powdered sugar
- 1/4 cup plain Greek yogurt
- 1 tsp vanilla bean paste or extract
- 3 cups assorted fresh fruit
- 2 tbsp apricot preserves (for glaze)
Instructions
- Preheat your oven to 350 degrees Fahrenheit. In a medium bowl, whisk together the melted butter, granulated sugar, and vanilla extract. Gradually fold in the flour and salt until a soft dough forms. Press this dough evenly into the bottom and up the sides of a 9-inch tart pan with a removable bottom. Prick the bottom of the crust with a fork.
- Place the tart pan on a baking sheet and bake for 15 to 18 minutes until light golden brown. Remove from the oven and let it cool completely on a wire rack.
- In a large mixing bowl, beat the softened cream cheese and powdered sugar together until smooth and fluffy. Add the Greek yogurt and vanilla, and continue beating until well combined.
- Once the crust is cool, spread the cream cheese mixture evenly over the bottom. Arrange your sliced fruit in concentric circles on top.
- Warm the apricot preserves in a small bowl for about 15 seconds, strain out any large chunks, and lightly brush the liquid over the fruit. Chill the tart in the refrigerator for at least one hour before serving.