Whenever Mona and I visit our favorite local Mexican spot, we always eye the dessert menu with a mix of excitement and hesitation. For years, I avoided ordering the fried ice cream because it usually arrived as a soggy, greasy mess that failed to live up to its name. I felt this classic dessert deserved better.
I knew I had to give this dish a “second chance” here at SecondRecipes.com. My goal was to create a version that kept the crunch but removed the stress and the grease. This Easy Fried Ice Cream recipe delivers that iconic, crispy texture without the mess of a deep fryer.
You get all the nostalgic flavor of the original dish but with a much simpler approach that actually stays crispy until the very last bite. Mona and I spent several afternoons testing different coatings until we found the perfect balance of sweetness and crunch. This Easy Fried Ice Cream represents my philosophy of simplifying complex dishes while making them even more delicious.
I promise that once you try this method, you will never want to deal with a vat of hot oil again. We believe that everyone deserves a reliable way to make restaurant-quality treats at home without the fuss. This Easy Fried Ice Cream is exactly that, a practical, foolproof dessert that will impress your family and friends every single time.
Why You’ll Love This Easy Fried Ice Cream
You will absolutely love this Easy Fried Ice Cream because it offers the perfect contrast of temperatures and textures. Most people think you need a professional kitchen and a dangerous deep fryer to achieve that signature golden crust. However, this recipe proves that you can reach dessert perfection using just your stovetop.
This Easy Fried Ice Cream focuses on a “no-fry” technique that uses toasted cornflakes and butter to mimic the traditional fried exterior. This method is much safer and significantly less messy than traditional frying. You won’t have to worry about the ice cream melting into your oil or the coating falling off in the fryer. Because we toast the coating separately, every single bite of this Easy Fried Ice Cream stays incredibly crunchy.
Another reason to fall in love with this Easy Fried Ice Cream is how customizable it is for your family. While I love the classic cinnamon and sugar profile, you can easily swap ingredients to fit your preferences. It is also a fantastic make-ahead dessert.
You can prepare the ice cream balls and the crunchy coating well in advance. When you are ready to serve, you just roll the ice cream in the crumbs and add your toppings. This Easy Fried Ice Cream saves you time during dinner parties or busy weeknights.
It turns a standard scoop of vanilla into a gourmet experience that looks like it took hours to prepare. Your guests will admire the presentation, and you will enjoy the simplicity of the process.
Ingredients You’ll Need
To make the best Easy Fried Ice Cream, you only need a few high-quality staples from your pantry and freezer. I always recommend using a premium, full-fat vanilla bean ice cream because the flavor really shines through. The cornflakes provide the essential crunch that makes this Easy Fried Ice Cream so satisfying.
I also use plenty of ground cinnamon to give it that warm, authentic Mexican restaurant aroma. Using real butter is non-negotiable here, as it helps the cornflakes brown beautifully and adds a rich, toasted flavor. Check the table below for the specific measurements you will need for this Easy Fried Ice Cream.
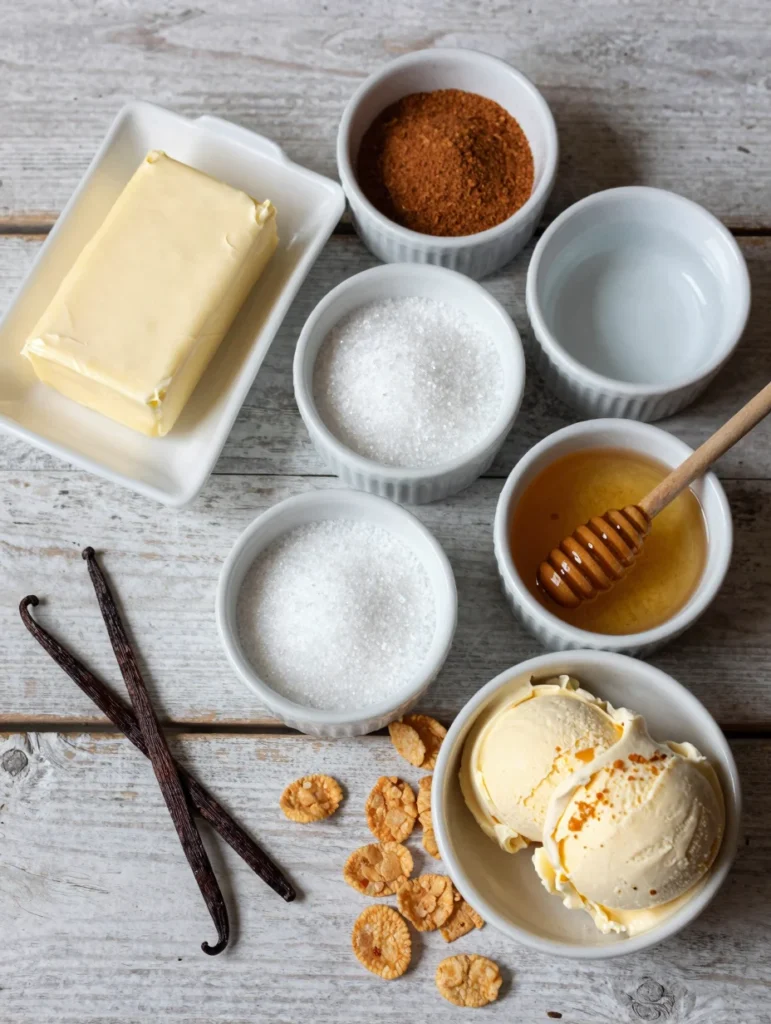
| Ingredient | Amount | Notes |
|---|---|---|
| Vanilla Bean Ice Cream | 1.5 Quarts | Use a high-quality, firm brand. |
| Cornflakes Cereal | 3 Cups | Crushed into small pieces. |
| Unsalted Butter | 1/2 Cup | One full stick. |
| Ground Cinnamon | 2 Teaspoons | Adds warmth and spice. |
| Granulated Sugar | 3 Tablespoons | Adjust to your sweetness preference. |
| Honey | For Drizzling | Provides a classic finish. |
| Whipped Cream | Optional | For garnish. |
| Maraschino Cherries | Optional | The perfect topper. |
Substitutions & Variations
I designed this Easy Fried Ice Cream to be versatile, so feel free to get creative with what you have in your kitchen. If you do not have cornflakes, you can substitute them with crushed Graham crackers or even toasted oats. Some of my readers prefer using Rice Krispies for a lighter, airier crunch.
If you want to make a gluten-free Easy Fried Ice Cream, simply ensure your cornflakes are certified gluten-free. For a dairy-free or vegan version, use your favorite plant-based vanilla ice cream and swap the butter for a high-quality vegan butter substitute or coconut oil. The Easy Fried Ice Cream works remarkably well with different ice cream flavors too. I have tried it with dulce de leche and salted caramel ice cream, and the results were spectacular.
You can also play with the spices in your Easy Fried Ice Cream coating. If you like a little heat, add a tiny pinch of cayenne pepper to the cinnamon and sugar mix. This creates a “Mexican Chocolate” vibe that pairs beautifully with a chocolate sauce drizzle.
For a nutty twist, mix half a cup of finely chopped pecans or walnuts into your toasted cornflake mixture. This adds another layer of texture to your Easy Fried Ice Cream. If you are celebrating a special occasion, you can even stir in some rainbow sprinkles into the coating. No matter which variation you choose, the core technique of this Easy Fried Ice Cream remains the same, ensuring a perfect result every time.
If you’re looking for a refreshing dessert to complement your Easy Fried Ice Cream, consider trying Easy Watermelon Sorbet. This light and fruity option is perfect for balancing the rich flavors of fried ice cream.
Step-by-Step Instructions
Creating this Easy Fried Ice Cream requires a little bit of patience, especially when it comes to freezing. You must ensure the ice cream is rock-hard before you attempt to roll it. Follow these steps carefully to achieve the best results with your Easy Fried Ice Cream.
- Scoop the Ice Cream: Line a baking sheet with parchment paper. Use a large ice cream scoop to create six to eight large, round balls of vanilla ice cream. Place them on the prepared sheet.
- First Freeze: Put the baking sheet in the freezer for at least two hours. This step is vital for Easy Fried Ice Cream because the balls need to be extremely firm to hold their shape later.
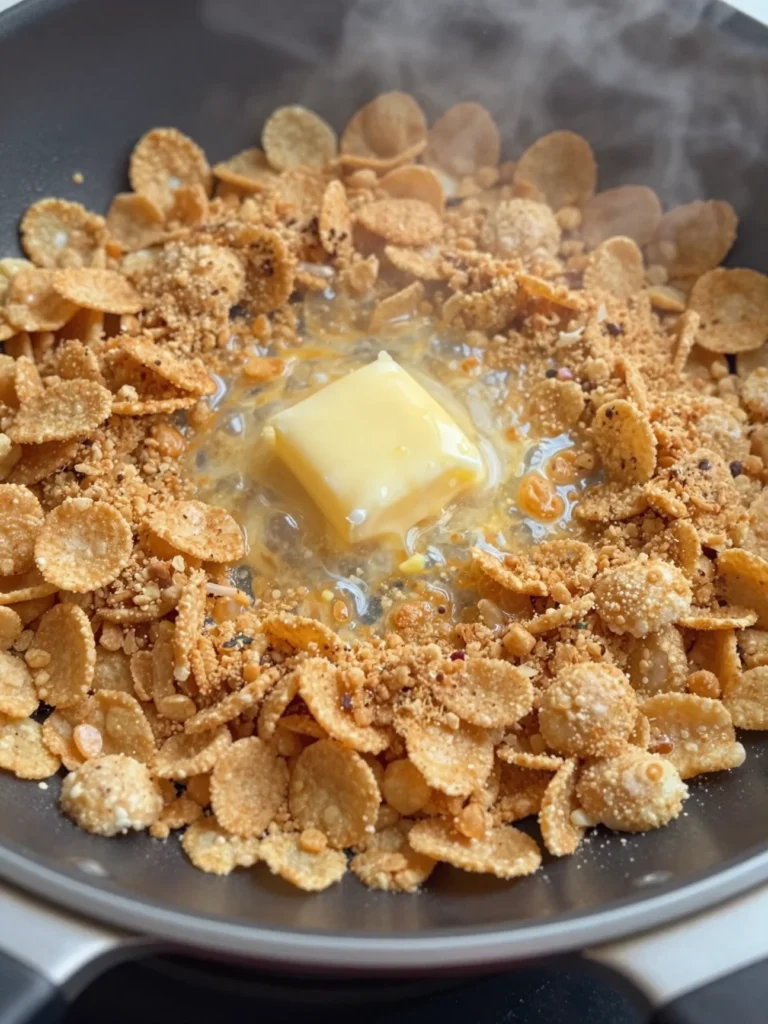
- Prepare the Coating: While the ice cream freezes, place your cornflakes in a heavy-duty plastic bag. Use a rolling pin to crush them into small crumbs. Do not turn them into powder, you want some texture.
- Toast the Crumbs: Melt the butter in a large skillet over medium heat. Add the crushed cornflakes and cinnamon to the pan. Stir constantly for about 3 to 5 minutes until the flakes turn a deep golden brown and smell toasted.
- Sweeten the Mix: Remove the skillet from the heat and stir in the sugar. Let the mixture cool completely. Never roll your Easy Fried Ice Cream in hot crumbs, or it will melt instantly.
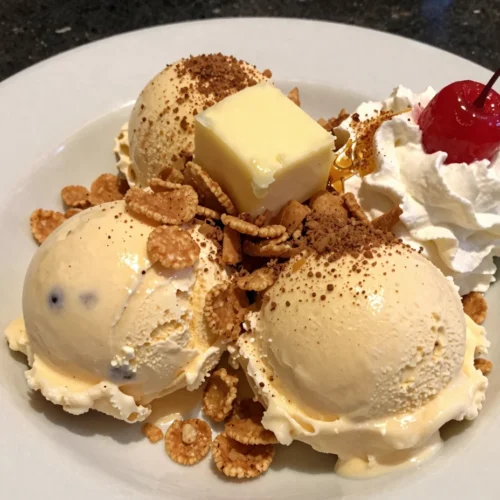
- Roll and Coat: Once the ice cream balls are firm and the crumbs are cool, take one ball out of the freezer at a time. Roll it firmly in the toasted cornflake mixture, pressing the crumbs into the surface so they stick well.
- Final Freeze: Return the coated Easy Fried Ice Cream balls to the freezer for another 30 minutes. This helps the coating set and ensures the ice cream doesn’t melt the moment you serve it.
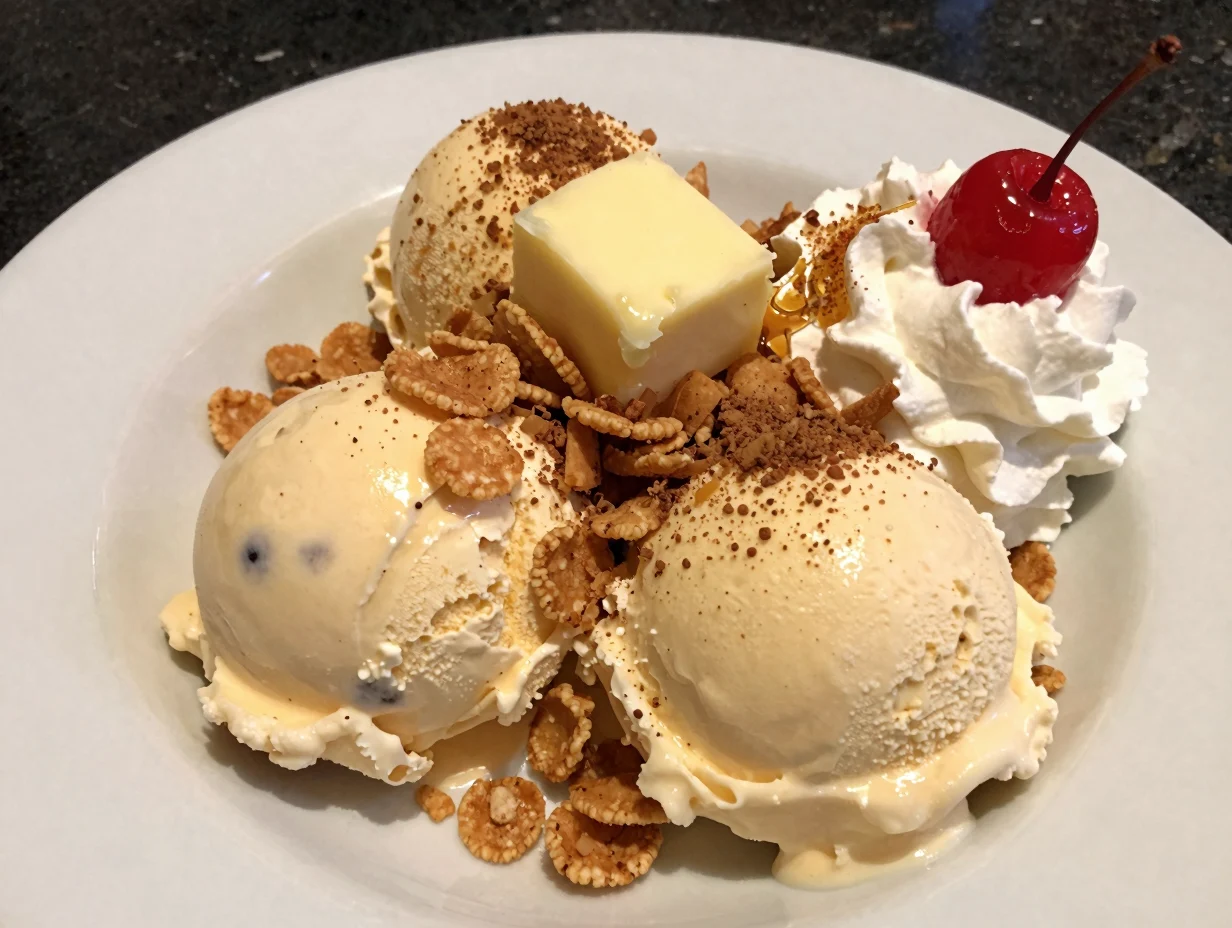
- Garnish and Serve: Just before serving, drizzle each ball with honey or chocolate sauce. Top with a dollop of whipped cream and a cherry.
Pro Tips for Success
My first tip for a perfect Easy Fried Ice Cream is to use a metal ice cream scoop. If you dip the scoop in warm water between each ball, you will get much smoother, rounder shapes. This makes the final presentation of your Easy Fried Ice Cream look much more professional.
Also, make sure your freezer is set to its coldest setting. The colder the ice cream, the easier it is to handle during the coating process. I always tell Mona that the “double freeze” method is the secret ingredient for this Easy Fried Ice Cream. Skipping the second freeze might result in a dessert that collapses under the weight of the toppings.
Another professional secret for Easy Fried Ice Cream involves the cooling of the crumbs. If you are in a hurry, spread the toasted crumbs out on a flat plate and put them in the refrigerator for ten minutes. This ensures they are perfectly cold before they touch the ice cream.
When rolling your Easy Fried Ice Cream, use your hands to really press the crumbs into the sides. You want a thick, even layer of crunch that completely hides the white ice cream inside. This creates that “surprise” factor when your guests dig in.
Finally, always serve your Easy Fried Ice Cream on chilled plates. This simple step buys you a few extra minutes of “crunch time” before the ice cream starts to soften at the table.
To enhance your presentation of Easy Fried Ice Cream, check out my tips for making Easy Baked Mac and Cheese. This comforting dish can be a great addition to your meal before indulging in dessert.
Storage & Reheating Tips
You can actually store your Easy Fried Ice Cream for several days if you follow the right steps. Once the balls are fully coated and frozen, transfer them to an airtight container. I recommend wrapping each individual ball in plastic wrap before putting them in the container to prevent freezer burn.
Your Easy Fried Ice Cream will stay fresh and delicious for up to one week. However, the longer they stay in the freezer, the more the coating might lose its initial “crisp-from-the-pan” texture. For the best experience, I suggest eating your Easy Fried Ice Cream within three days of making it.
Regarding reheating, there is absolutely no need to reheat this Easy Fried Ice Cream! The whole point of the dish is the contrast between the cold interior and the “fried” tasting exterior. If you feel the coating has softened slightly in the freezer, you can quickly toast a fresh batch of crumbs and roll the Easy Fried Ice Cream again just before serving.
Never put these in the microwave or oven, as you will end up with a puddle of sweet soup. This Easy Fried Ice Cream is designed to be a “grab and go” dessert from the freezer. Simply take it out, add your fresh toppings, and enjoy the perfect cold treat.
What to Serve With This Recipe
This Easy Fried Ice Cream is a showstopper on its own, but it also pairs beautifully with other flavors. I love serving it alongside a plate of warm, cinnamon-dusted churros. The combination of the hot dough and the cold Easy Fried Ice Cream is a match made in heaven.
If you want to lean into the Mexican theme, serve it after a meal of spicy tacos or enchiladas. The creamy vanilla and cooling cinnamon of the Easy Fried Ice Cream provide the perfect palate cleanser after a spicy dinner. Mona also suggests serving it with a side of fresh berries, like strawberries or raspberries, to add a bit of tartness to the dish.
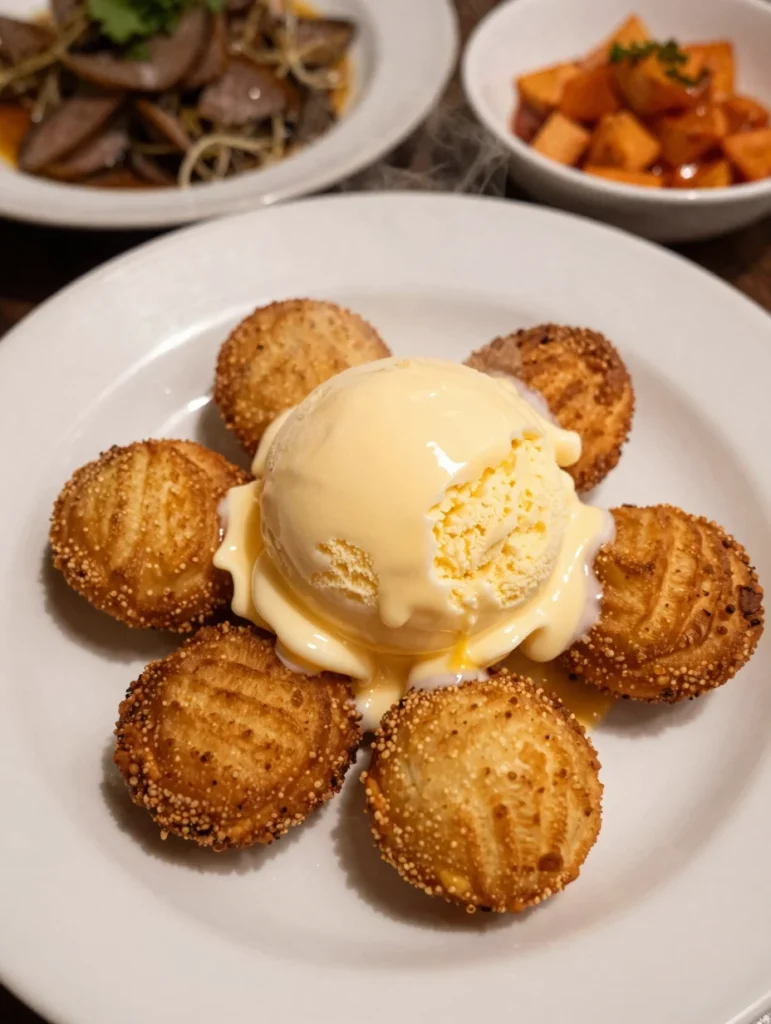
For a truly decadent experience, you can serve your Easy Fried Ice Cream in a homemade tortilla bowl. Simply fry a flour tortilla in a little oil until it is crispy, dust it with cinnamon sugar, and place the ice cream ball inside. This adds even more crunch and makes the Easy Fried Ice Cream feel like a high-end restaurant dessert.
If you are hosting a party, consider setting up a “Fried Ice Cream Bar.” Place the pre-coated Easy Fried Ice Cream balls in a bowl of ice and provide various syrups, sprinkles, and nuts. This allows your guests to customize their Easy Fried Ice Cream exactly how they like it, making your gathering memorable and fun.
For a delightful meal pairing, serve your Easy Fried Ice Cream alongside Easy Chicken Tortilla Soup. The spicy flavors of the soup will beautifully contrast with the sweet, creamy dessert.
FAQs
Can I make Easy Fried Ice Cream without cornflakes?
Yes, you can use Graham crackers, crushed Nilla wafers, or even crispy rice cereal. The key is to use something that provides a significant crunch once toasted with butter and sugar for your Easy Fried Ice Cream.
How do I stop the ice cream from melting while I coat it?
The secret is to ensure the ice cream is “rock-hard” frozen before you start. Work with only one Easy Fried Ice Cream ball at a time, keeping the others in the freezer until you are ready for them.
Is this Easy Fried Ice Cream actually fried?
This specific recipe is a “no-fry” version. We toast the coating in a pan to get that fried flavor and texture without actually submerging the ice cream in hot oil. It is the best way to make Easy Fried Ice Cream at home.
Can I use different ice cream flavors?
Absolutely! While vanilla is traditional for Easy Fried Ice Cream, flavors like chocolate, strawberry, or caramel also taste amazing with the cinnamon-cornflake crust. Use any flavor that you think pairs well with cinnamon.
How long can I keep the coated balls in the freezer?
You can keep your Easy Fried Ice Cream balls in an airtight container for up to a week. For the best flavor and texture, I recommend consuming them within 48 to 72 hours.
Easy Fried Ice Cream is a popular dessert that combines the delightful contrast of hot and cold, featuring a crispy exterior and creamy interior. This dish is often associated with Mexican cuisine and can be made using various coatings to achieve the desired texture, making it a versatile treat for any occasion. For more information, visit this link.
Nutrition Information (per serving)
This Easy Fried Ice Cream is a decadent treat meant for special occasions. While I focus on making recipes lighter at SecondRecipes.com, some dishes are best enjoyed in their full-flavored glory. Here is the approximate nutritional breakdown for one serving of Easy Fried Ice Cream (one large ball with coating).
| Nutrient | Amount per Serving |
|---|---|
| Calories | 410 kcal |
| Total Fat | 24g |
| Saturated Fat | 15g |
| Cholesterol | 75mg |
| Sodium | 210mg |
| Total Carbohydrates | 46g |
| Dietary Fiber | 1g |
| Sugars | 32g |
| Protein | 4g |
Enjoy your Easy Fried Ice Cream responsibly and remember that the joy of cooking comes from sharing these delicious moments with the people you love. Mona and I hope this recipe becomes a new favorite in your household just as it has in ours!
Easy Fried Ice Cream
Ingredients
- 1.5 Quarts Vanilla Bean Ice Cream
- 3 Cups Cornflakes Cereal (crushed)
- 1/2 Cup Unsalted Butter
- 2 Teaspoons Ground Cinnamo
- 3 Tablespoons Granulated Sugar
- Honey (for drizzling)
- Whipped Cream (optional)
- Maraschino Cherries (optional)
Instructions
- Scoop the ice cream into large balls and freeze for at least two hours.
- Crush cornflakes in a bag and toast with melted butter and cinnamon in a skillet until golden.
- Mix in sugar and let cool.
- Roll frozen ice cream balls in the cooled cornflake mixture.
- Freeze again for 30 minutes before serving.
- Drizzle with honey and top with whipped cream and cherries.