Growing up in California City, some of my fondest memories involve a crackling campfire, a heavy knit sweater, and the inevitable sticky fingers that come with a perfectly toasted marshmallow. There is something magical about the combination of crunchy graham crackers, melting chocolate, and gooey marshmallows. However, as much as I love the tradition, the mess and the need for an open flame often keep s’mores as a rare treat reserved for summer camping trips.
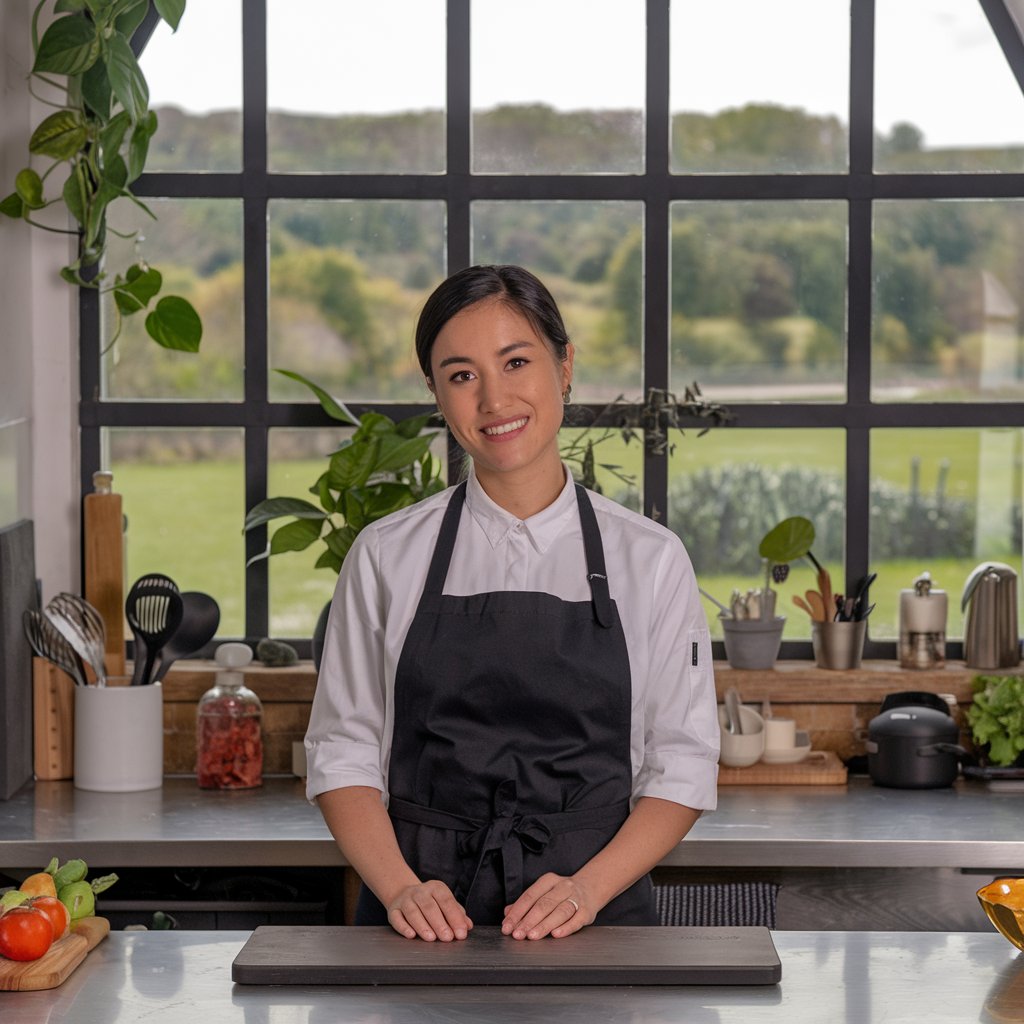
At SecondRecipes.com, Stephen and I believe that every classic dish deserves a “second life.” We love taking those nostalgic flavors and reimagining them into something more approachable, balanced, and ready for your modern kitchen. That is exactly how these S’mores Bars were born.
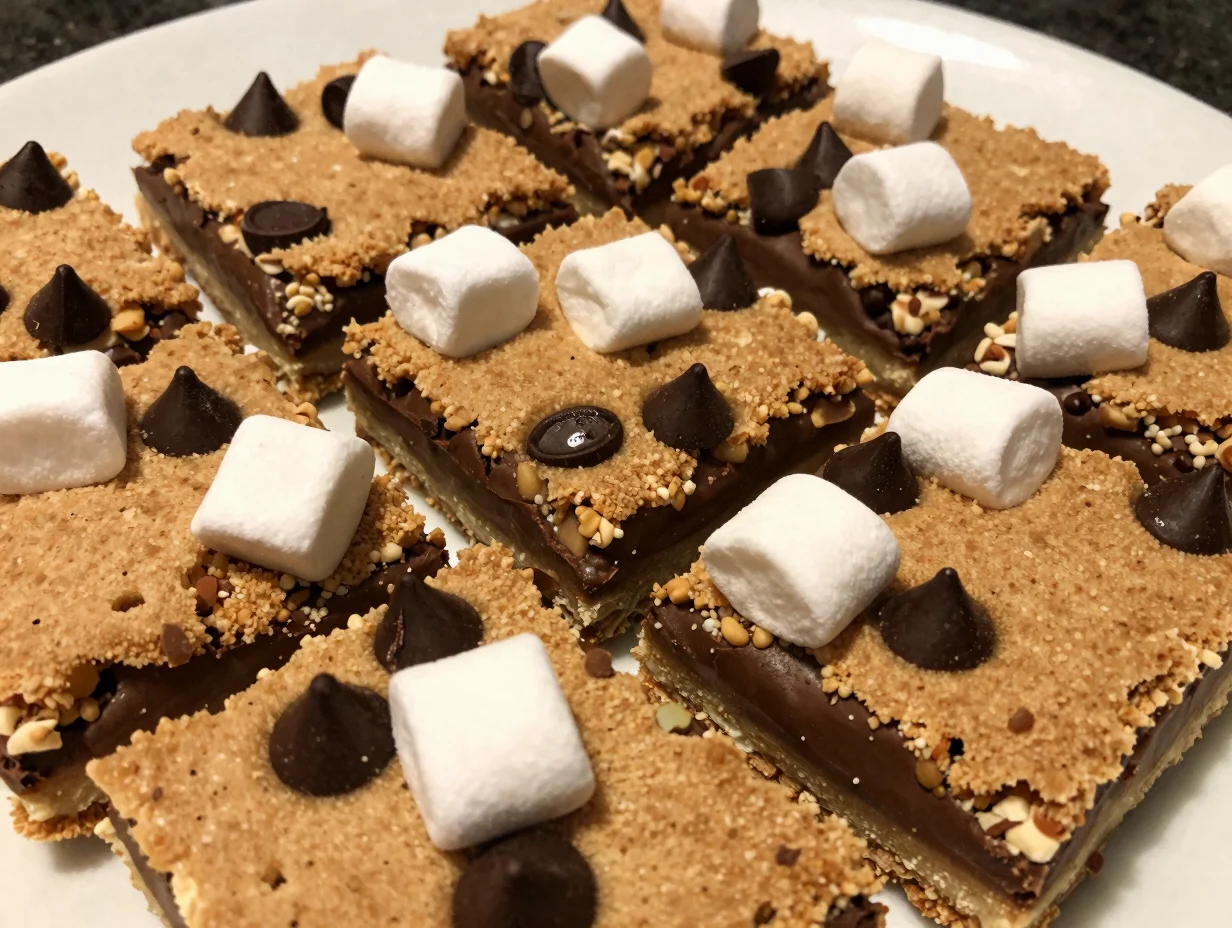
I wanted to capture every bit of that campfire soul but deliver it in a neat, sliceable, and incredibly decadent bar that you can make in your oven any day of the year. These S’mores Bars represent the bridge between childhood whimsy and effortless home baking.
When I first started testing this recipe in our kitchen, Stephen was my primary taste tester. He reminded me that the best s’mores are not just about sweetness, they are about the contrast of textures. You need that buttery, salty crunch from the base to stand up against the velvet chocolate and the airy, toasted marshmallow topping.
These S’mores Bars achieve that balance perfectly. By giving the traditional campfire snack a second life as a tray bake, we have created a dessert that is easy to share at potlucks, birthday parties, or just a quiet Friday night at home. You do not need a tent or a fire pit to enjoy the smoky, sweet essence of a s’more.
My goal as a chef is to make sure you feel confident and excited in the kitchen, and these S’mores Bars are the ultimate “win” for any skill level. They are forgiving, fun to assemble, and guaranteed to bring a smile to anyone who takes a bite.
Why You’ll Love This S’mores Bars Recipe
You will absolutely adore these S’mores Bars because they eliminate the stress of the traditional assembly line. Instead of hovering over a flame and hoping your marshmallow does not catch fire before it melts the chocolate, you simply layer your ingredients and let the oven do the heavy lifting. This recipe provides a consistent result every single time, ensuring that every square has the perfect ratio of crust to cocoa to creaminess.
These S’mores Bars are also incredibly portable. Unlike a traditional s’more that falls apart the moment you take a bite, these bars hold their shape beautifully. This makes them the ideal candidate for school bake sales, office treats, or picnic desserts.
Another reason to love this S’mores Bars recipe is the sophisticated flavor profile we have developed. While we use classic ingredients, the addition of a little extra sea salt in the graham cracker crust elevates the entire experience. It cuts through the sugar and makes the chocolate taste richer.
We focus on a “second life” approach by making the process more efficient without sacrificing the soul of the dish. You get all the comfort of a childhood favorite with the refined texture of a professional pastry. Plus, your kitchen will smell like a toasted marshmallow dream for hours after you pull these out of the oven.
Ingredients You’ll Need
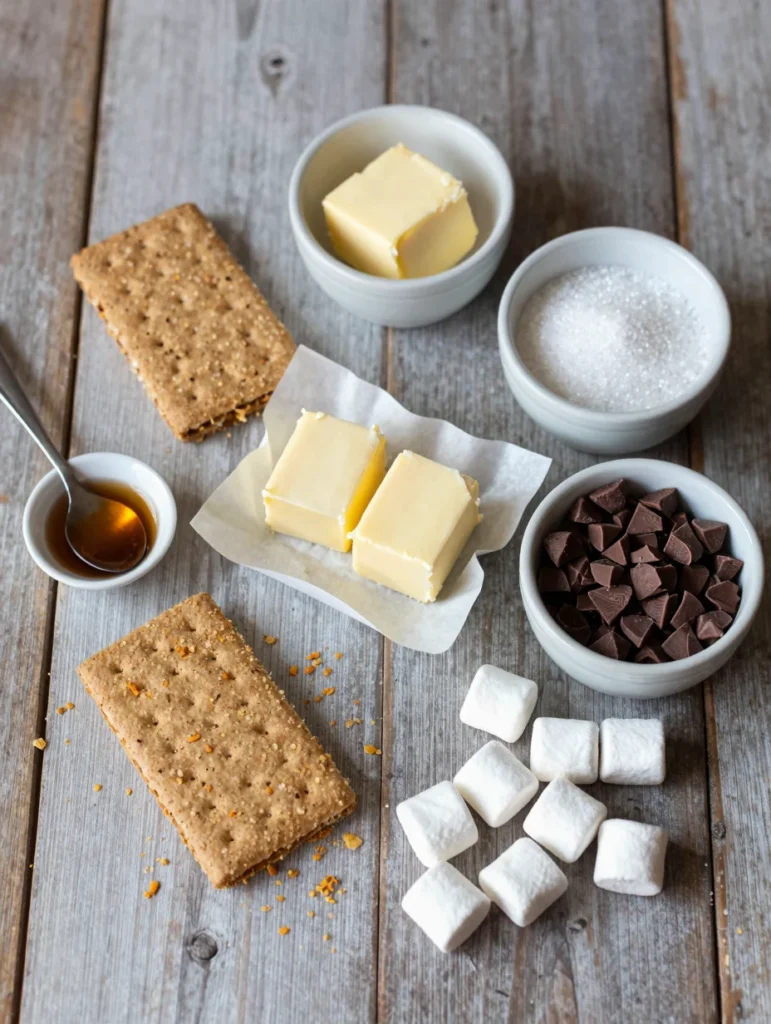
Creating the perfect S’mores Bars requires a few pantry staples and a couple of specific treats. I always recommend using high quality butter and real vanilla extract to ensure the flavors really pop. Here is everything you will need to get started on your S’mores Bars journey.
| Ingredient | Quantity | Purpose |
|---|---|---|
| Graham Cracker Crumbs | 2 ½ Cups | The crunchy, honey-sweet base for our S’mores Bars. |
| Unsalted Butter (Melted) | ¾ Cup | Binds the crumbs and adds a rich, buttery flavor. |
| Granulated Sugar | ½ Cup | Adds a touch of sweetness to the crust. |
| Salt | ½ Teaspoon | Balances the sugar and enhances the chocolate. |
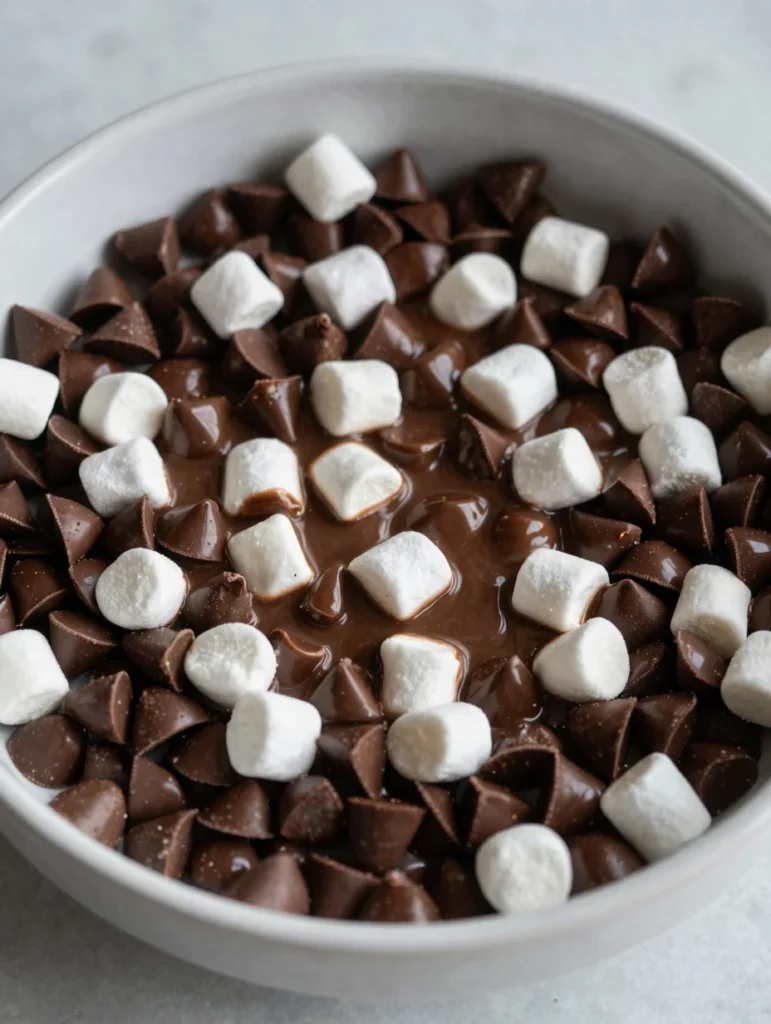
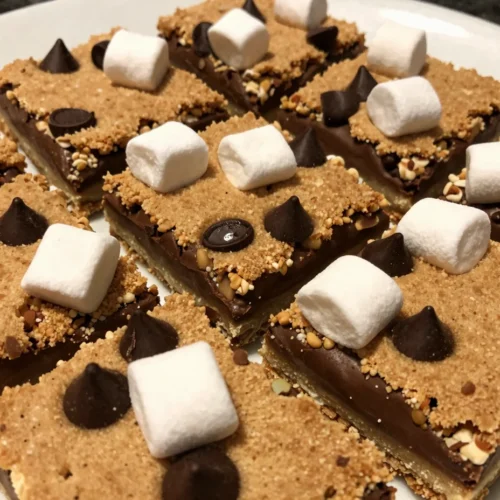
| Semi-Sweet Chocolate Chips | 2 Cups | The gooey, melty center of our S’mores Bars. |
| Mini Marshmallows | 4 Cups | Provides the iconic toasted topping. |
| Milk Chocolate Bars (Optional) | 2 Standard Bars | Broken into pieces for a classic look on top. |
| Vanilla Extract | 1 Teaspoon | Adds depth and warmth to the marshmallow layer. |
Substitutions & Variations
At SecondRecipes.com, we encourage creativity. If you want to give these S’mores Bars your own personal twist, there are plenty of ways to swap ingredients. For a gluten-free version, simply use gluten-free graham crackers.
They work perfectly in the crust and provide the same satisfying crunch. If you prefer a less sweet dessert, try using dark chocolate chips with a 60% or 70% cocoa content. The bitterness of the dark chocolate pairs beautifully with the sweet marshmallow topping in these S’mores Bars.
You can also experiment with the marshmallow layer. If you cannot find mini marshmallows, you can use marshmallow fluff for a much gooier, albeit messier, center. Some of my friends even like to add a layer of peanut butter between the crust and the chocolate.
Peanut butter S’mores Bars are a game changer for anyone who loves that salty-sweet combination. For a festive holiday twist, sprinkle some crushed peppermint over the chocolate before adding the marshmallows. The possibilities are endless when you use this base recipe as your canvas.
If you’re looking to add a unique twist to your S’mores Bars, consider trying out our Marshmallow Cookies – A Sweet Treat to Satisfy Your Cravings. These cookies can provide a delightful variation while still keeping that beloved marshmallow flavor.
Step-by-Step Instructions
Follow these simple steps to bring your S’mores Bars to life. I promise the process is just as enjoyable as the final result!
- Prepare your oven and pan: Preheat your oven to 350°F (175°C). Line an 8×8 or 9×9 inch square baking pan with parchment paper. Ensure the paper hangs over the edges so you can easily lift the S’mores Bars out later.
- Make the graham cracker crust: In a medium mixing bowl, combine the graham cracker crumbs, melted butter, sugar, and salt. Stir until the mixture looks like wet sand. Press this mixture firmly into the bottom of your prepared pan. Use the bottom of a flat glass to ensure the crust is even and packed tight.
- Blind bake the base: Place the pan in the oven and bake the crust for 8 to 10 minutes. This helps the S’mores Bars stay together and prevents a soggy bottom. Remove from the oven but keep the heat on.
- Add the chocolate layer: Sprinkle the semi-sweet chocolate chips evenly over the hot crust. If you want an extra-melty experience, you can pop the pan back in the oven for 1 minute to help the chocolate soften.
- Layer the marshmallows: Spread the mini marshmallows in a thick, even layer over the chocolate. If you are using the optional milk chocolate bar pieces, tuck them among the marshmallows now.
- The final toast: Return the pan to the oven and bake for another 10 to 12 minutes. The marshmallows should be puffed and starting to turn a light golden brown. For a truly “campfire” look, you can turn on the broiler for the last 30 to 60 seconds. Watch them very closely, as marshmallows can burn in the blink of an eye!
- Cooling is key: This is the hardest part. Allow the S’mores Bars to cool completely in the pan for at least 2 hours. This sets the chocolate and the crust so you can get clean, beautiful slices.
Pro Tips for Success
To ensure your S’mores Bars turn out like they came from a high-end bakery, keep these professional tips in mind. First, always line your pan with parchment paper. Marshmallows are incredibly sticky when melted, and without parchment, you might find it nearly impossible to remove the S’mores Bars from the pan without breaking them. Use a little bit of butter or non-stick spray to help the paper stay in place.
Second, when it comes time to slice your S’mores Bars, use a hot, slightly damp knife. Run your knife under hot water, wipe it quickly, and then make your cut. The heat helps the blade glide through the marshmallow and chocolate without pulling or tearing the layers.
Repeat this process for every single cut. This technique is a secret Stephen and I use for all our sticky bar recipes at SecondRecipes.com to ensure every piece looks picture-perfect. Finally, do not rush the cooling process. If you cut into the S’mores Bars while they are still warm, the chocolate will run, and the crust may crumble.
For tips on achieving bakery-quality S’mores Bars, check out our guide on Creepy Deviled Eggs – Spooky & Fun Halloween Party Snack. These professional baking tips will ensure your bars are perfectly sliced and presented.
Storage & Reheating Tips
If you happen to have any leftovers, storing your S’mores Bars is quite simple. You can keep them in an airtight container at room temperature for up to 3 to 4 days. I find that they stay freshest when you place a piece of parchment paper between the layers to prevent the marshmallows from sticking together. If your kitchen is particularly warm, you may want to store your S’mores Bars in the refrigerator to keep the chocolate firm.
If you prefer that “just out of the oven” gooey texture, you can reheat an individual square in the microwave. Just 10 to 15 seconds is usually enough to soften the chocolate and make the marshmallow stretchy again. Be careful not to overheat them, or the S’mores Bars will lose their structural integrity. We do not recommend freezing these bars, as the marshmallows can become rubbery and lose their airy texture once thawed.
What to Serve With This Recipe
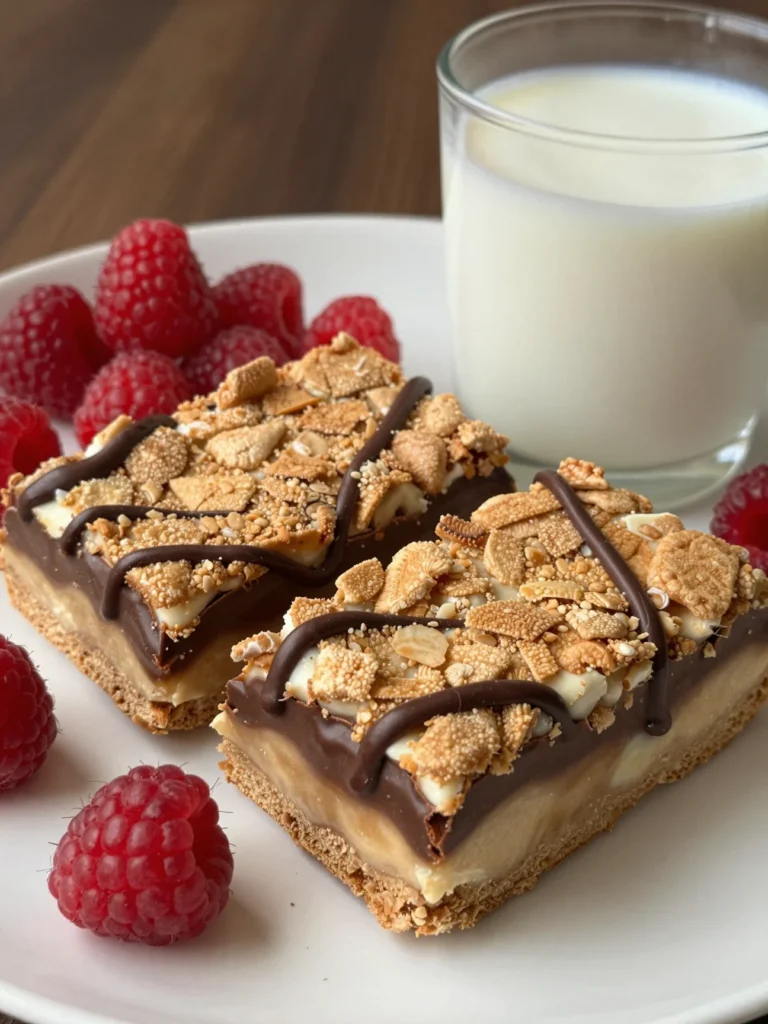
S’mores Bars are quite rich and decadent, so I like to serve them with something that offers a bit of a palate cleanser. A cold glass of dairy or almond milk is the classic choice and for good reason. The cold liquid cuts through the sweetness and cleanses the tongue between bites.
If you are serving these S’mores Bars at a dinner party, consider a side of fresh raspberries or strawberries. The tartness of the berries provides a wonderful contrast to the deep chocolate and toasted sugar flavors.
For an extra indulgent “second life” dessert experience, serve a warm S’mores Bar with a scoop of high quality vanilla bean ice cream. The way the cold ice cream melts into the warm marshmallow is absolutely divine. If you are enjoying these in the evening, a cup of bitter black coffee or a strong espresso is the perfect adult accompaniment. The bitterness of the coffee highlights the toasted notes of the graham cracker crust in the S’mores Bars.
To balance the richness of your S’mores Bars, consider serving them alongside our Light Turkey Lettuce Tacos. The fresh flavors of the tacos will complement the sweetness of the bars beautifully.
FAQs
Can I make S’mores Bars without graham crackers?
Yes, you can substitute the graham crackers with crushed Biscoff cookies or digestive biscuits. Both options provide a similar texture and a delicious flavor that complements the chocolate and marshmallows perfectly. Some people even use crushed pretzels for a saltier base.
What is the best way to get a toasted marshmallow top?
The best way to get that signature toasted look on your S’mores Bars is to use the oven broiler for the final minute of baking. However, you must stay right next to the oven and watch through the window. Marshmallows go from golden to burnt very quickly. Alternatively, a kitchen torch can give you more control over the browning.
Can I use marshmallow fluff instead of mini marshmallows?
You can certainly use marshmallow fluff, but the texture will be much softer. When you use fluff in S’mores Bars, the layer tends to spread more and will not get that same “puffy” toasted appearance. It is a great option if you want a very gooey, spreadable center rather than a distinct topping.
How do I stop my S’mores Bars from falling apart?
The secret to structural integrity is pressing the crust down firmly and allowing the bars to cool completely. If the crust is loose, the S’mores Bars will crumble. Using enough melted butter is also crucial as it acts as the “glue” for your graham cracker crumbs.
Can I add nuts to this recipe?
Absolutely! Chopped walnuts or pecans added to the graham cracker crust or sprinkled over the chocolate layer can add a wonderful crunch and a nutty depth to your S’mores Bars. This is a great way to put a sophisticated spin on the classic campfire flavor.
S’mores Bars are a delightful dessert that captures the essence of the classic campfire treat in a convenient bar form. These bars combine the flavors of graham crackers, chocolate, and marshmallows, making them a popular choice for gatherings and celebrations, as noted in this article on marshmallows.
Nutrition Information (per serving)
While these S’mores Bars are definitely a treat, it is always helpful to know the nutritional breakdown. This information is based on cutting the pan into 16 even squares.
| Nutrient | Amount per Serving |
|---|---|
| Calories | 285 kcal |
| Total Fat | 14g |
| Saturated Fat | 8g |
| Cholesterol | 22mg |
| Sodium | 180mg |
| Total Carbohydrates | 38g |
| Dietary Fiber | 1g |
| Sugars | 24g |
| Protein | 2g |
We hope you enjoy making and eating these S’mores Bars as much as we do. At SecondRecipes.com, we believe food is the ultimate connector, and nothing brings people together quite like a tray of warm, gooey chocolate treats. Whether you are sharing these with family or enjoying a square by yourself, remember that every recipe is an opportunity to create a new memory. Happy baking from Mona and Stephen!
S'mores Bars
Ingredients
- 2 ½ Cups Graham Cracker Crumbs
- ¾ Cup Unsalted Butter (Melted)
- ½ Cup Granulated Sugar
- ½ Teaspoon Salt
- 2 Cups Semi-Sweet Chocolate Chips
- 4 Cups Mini Marshmallows
- 2 Standard Bars Milk Chocolate (Optional)
- 1 Teaspoon Vanilla Extract
Instructions
- Preheat your oven to 350°F (175°C) and line an 8x8 or 9x9 inch square baking pan with parchment paper.
- In a medium mixing bowl, combine the graham cracker crumbs, melted butter, sugar, and salt. Press this mixture firmly into the bottom of your prepared pan.
- Bake the crust for 8 to 10 minutes, then remove from the oven.
- Sprinkle the semi-sweet chocolate chips evenly over the hot crust.
- Spread the mini marshmallows in a thick, even layer over the chocolate.
- Return the pan to the oven and bake for another 10 to 12 minutes until the marshmallows are puffed and golden brown.
- Allow the S'mores Bars to cool completely in the pan for at least 2 hours before slicing.